2017 This year I was hoping to run my main engine, it has not been run for some time to the fact the original batteries died a long time ago and to replace them is quite expensive and as the engine would only be run a couple of times a year it is a great expense to justify.
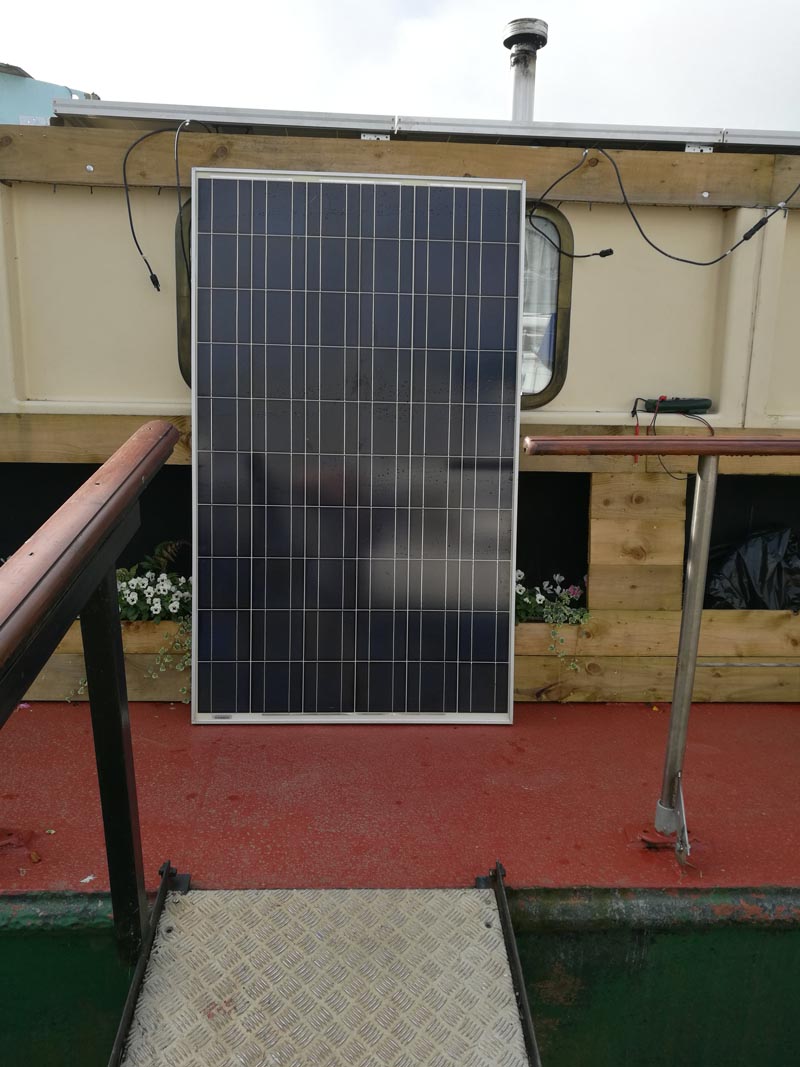
one of 6 solar panels
Part of my plans for Diction was to get and fit a solar panel and battery system for back up when the mains fails as it can do a lot in winter here in the boat yard, a solar system would make getting engine batteries more feasible, however normal lead acid starting batteries are really not suited to running inverters with constant charge and discharge, so i decided to hit the tinternet to see what other are using.

4 of 6 temp position
This is where I came across diy bods building li ion power walls using old salvaged laptop batteries other wise known as 18650’s, with a lot of these batteries being available, I thought this was a great way to go, it would mean a lot of testing to weed out the bad ones and record the capacity of the good ones.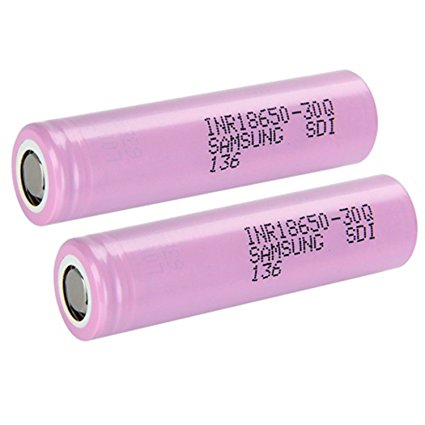
There are many youtube videos on the matter, i managed to buy just over 1200 from a couple of people who had done all the hard work but had decided to give up their project.
Anyway, I joined one of the online forums mainly for advice and help, as building power walls is a little involved and understanding the huge power available from these little batteries to give you idea just how much power is available, the Tesla model S has just under 7000 of these batteries rated at 3.4 amp each, with one full charge the car will do approximately 330 miles at up 150 mph.
On the diy forum I got in touch with a chap who had a few thousand 18650 batteries for sale but he was in Manchester which is a long way to go to get a few batteries, however a couple of months later I had to attend a meeting in Harrogate, so arranged to meet the chap the following day on our back south.
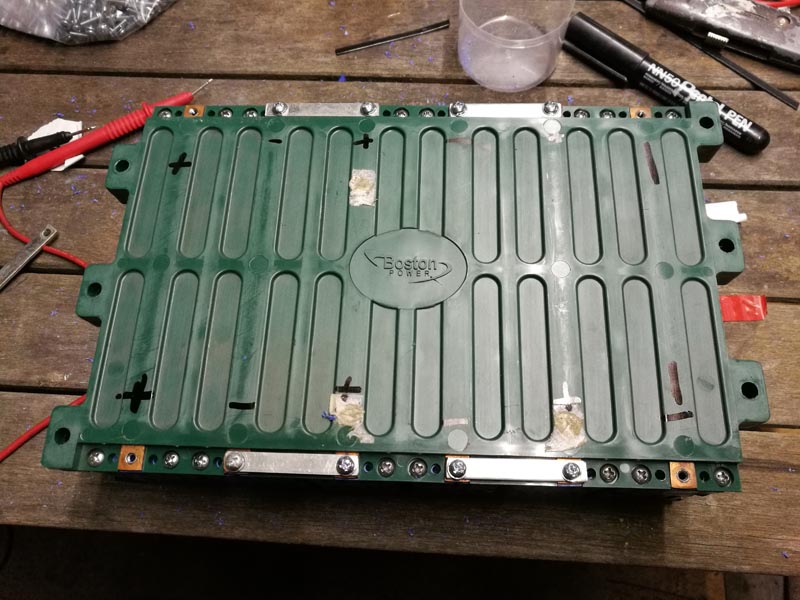
We meet at his shop where I found an array of li ion batteries of various sorts and sizes, this is where my plan changed a little I ended up buying a different type of li ion battery, these where made by Boston Power for the car & van market, the spec for these was much better and tests carried showed the batteries had only lost 2% their capacity they are about 6/7 years old and had been fitted to one of a fleet of 50 Sainsbury electric home delivery vans in the London area, how this truck met its demise is unknown at this time, anyway I brought 36 strips of eight cells each cell being 4.4 amp @3.7 volt and each strip tested to 34.8amp, put 6 of these in series and you have a 24volt battery @ 34.8 amp this would mean I have 6 x 24 batteries @34.8 amp =208 ah .
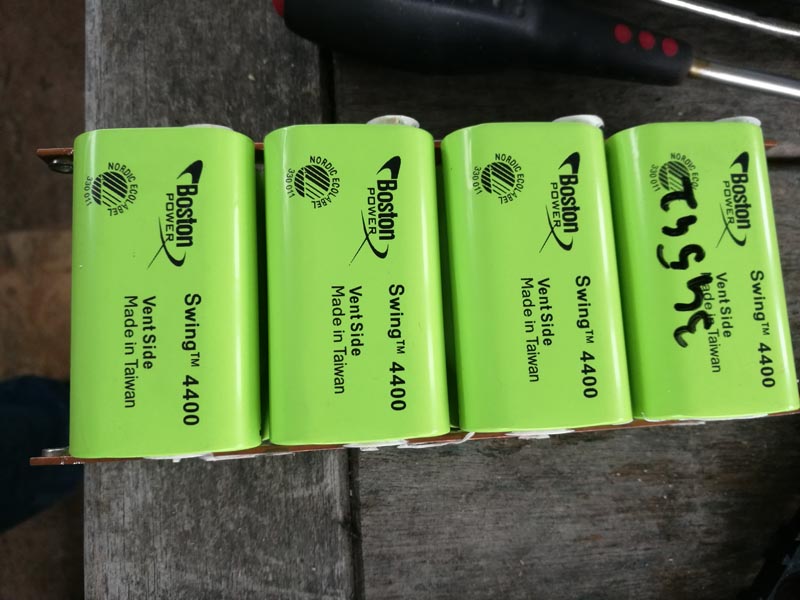
swing4400
This was great except I needed a lot more ampere for my planned system, now call it fate or fortune but I found a fella selling these but in packs of 6 in their own cases which was even better as the cases could be rearranged into 24volt units, at the time of writing i have 22 packs all tested connected in parallel which give muse 765 ampere with another 450 amperes to be assembled but these are in strip form 80 off.
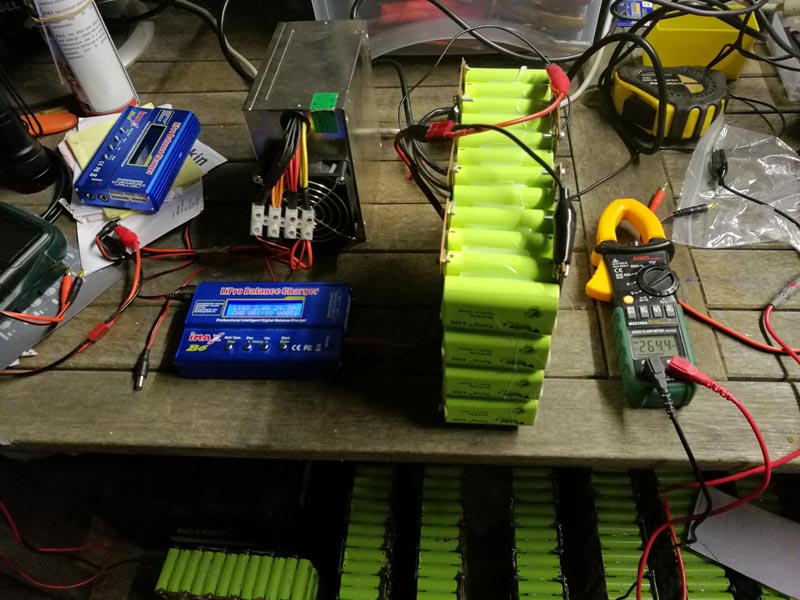
Testing
Which will give us 1200 ampere to play with.
Now why Boston Power li ion, we at the moment it is the best battery technology that we can afford they have had a better life than worn out laptop batteries, can operate at much colder temps than the 18650’s
Can be fast charged at a rate of 2 times their normal discharge rate, however that would be some battery charger given the number of batteries these batteries can be discharged at a max of 2.5 times their normal rate should you have the need, I don’t think I will ever be in a position to use all this power.
4.2volt 210 AH Pack
These batteries can be used for most anything, these will run my ships equipment, start my main engine that uses about 250 amperes, and power my inverter to supply the boat with all its essential mains power for 4/5 days (this will not include washing machine and immersion heater) the inverter will not handle these, they can and will be charged with solar power and the mains via the inverter.
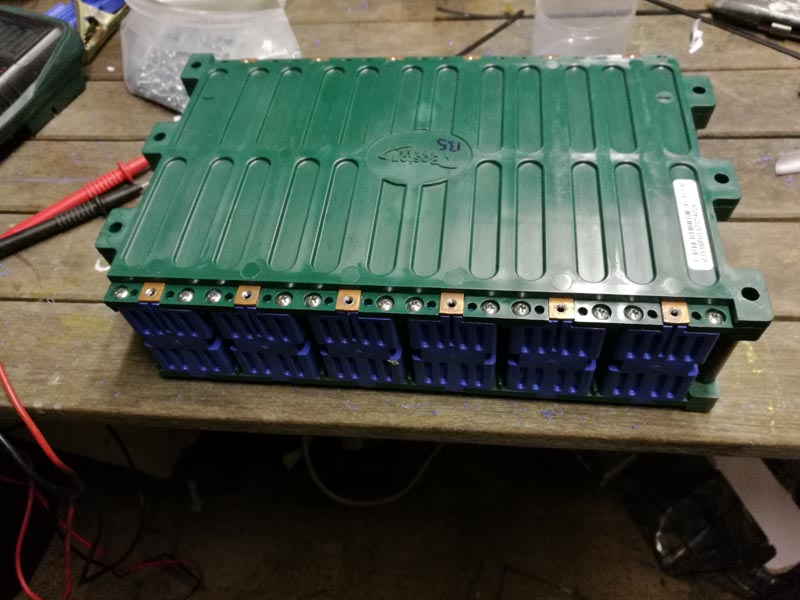
Openiing Pack
And the best I have left till last is the life cycles, this is the number of times the batteries can be charged, here’s how it works if you fully charge the batteries then fully discharge them you will get 1000 cycles, however if you fully charge them the only discharge to 90% of the capacity then you get 2000 cycles, and if you only discharge to 80% then you can get 3500 cycles, now if we discharged to 80% twice a week, the batteries would last for 33+ years that may happen but it will be rarely, and the very best lead acid batteries last for 15 to 20 years so it a real no brainer.
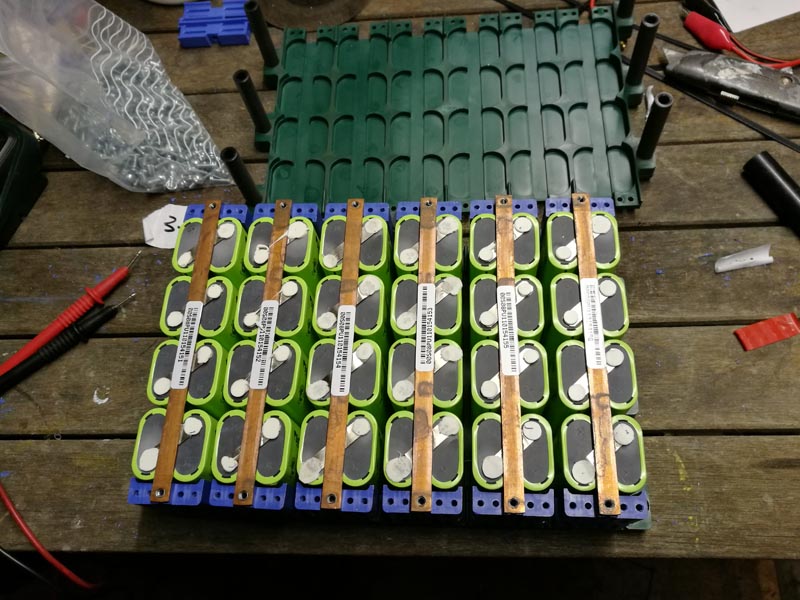
Modifing Pack
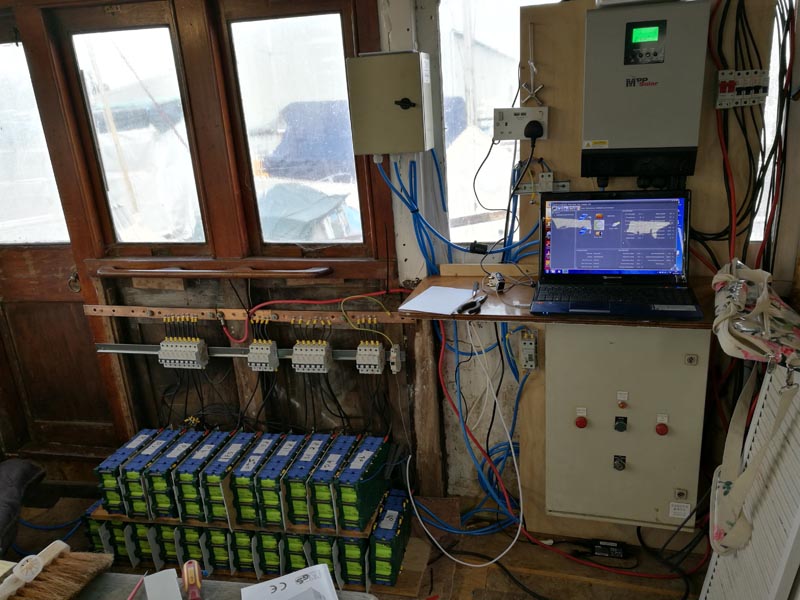
Now for the rest of the system the inverter charger is a Mpp Solar 2424 a 2.4 kw inverter this unit can charge the batteries from utility mains at up to 60amp and has dual solar inputs each one can handle 1 kw @100 volt, which will charge up to 40 amp each, this could give a total of 140amp total charging capacity. The system can be run via pc or from the small front screen.it would be nice if there was an app for this, but I can still run this remotely via separate software which I have just tested from 250 miles away cool.
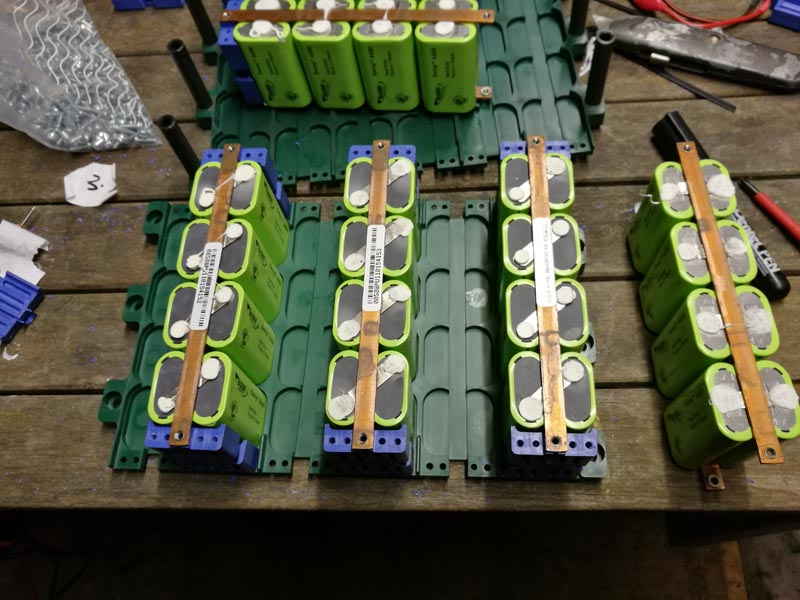
Swapping Battery Strips to Change Voltage
The solar panel I have purchased are ex solar farm panels approx. 5 years old these are made by Canadian solar and are 245 watt at 37volt at 8.4amp max I brought 6 of these before I brought my inverter so we might need a couple more, but at the moment the place I want to fit them is not ready and hopefully will by the end of 2018, the panels are just screwed on a frame on the deck at the moment and seem to work ok.
Modified busbar to change voltage from 4.2v to 25.2v
The batteries and inverter are set up in the half-done wheel house but this is temporary till I sort the space for everything to go.
Testing prior to attempting to run my system the battery pack where individually charged to 25.2 volt this is fully charged for these packs, cable where made to connect the all the negatives to a common connection, soon to be a proper busbar the positive cable was feed to a copper busbar via a 40 amp trip switch, this will stop excess power being drawn from individual packs, it also allows me to remove problem packs and to charge any that may stray in voltage terms, just my way of being able to balance the batteries.
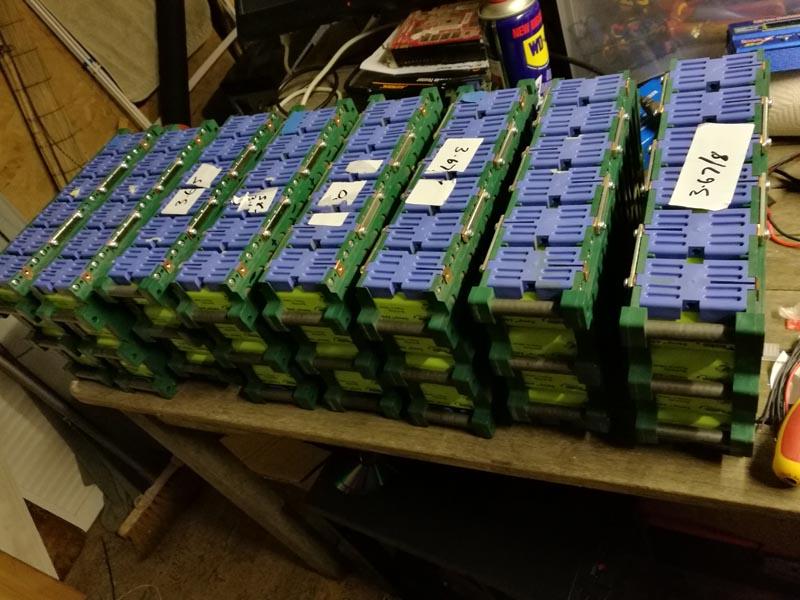
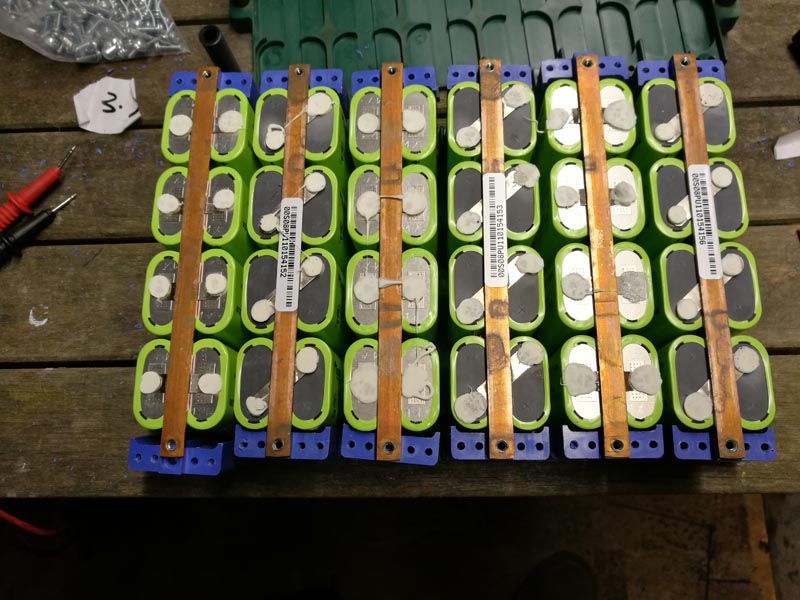
Converted Packs
I then reconfigured our mains supply which meant running two new cables the full length of the boat to take our mains supply direct to the inverter, and the second cable to supply a new fuse box , this routed the shore supply direct to a control box which supplies the inverter and also can bypass the inverter if there is a problem with it, and also a supply back to fuse boxes, at this point the solar panels had been connected and tested using a couple of old lead acid batteries.
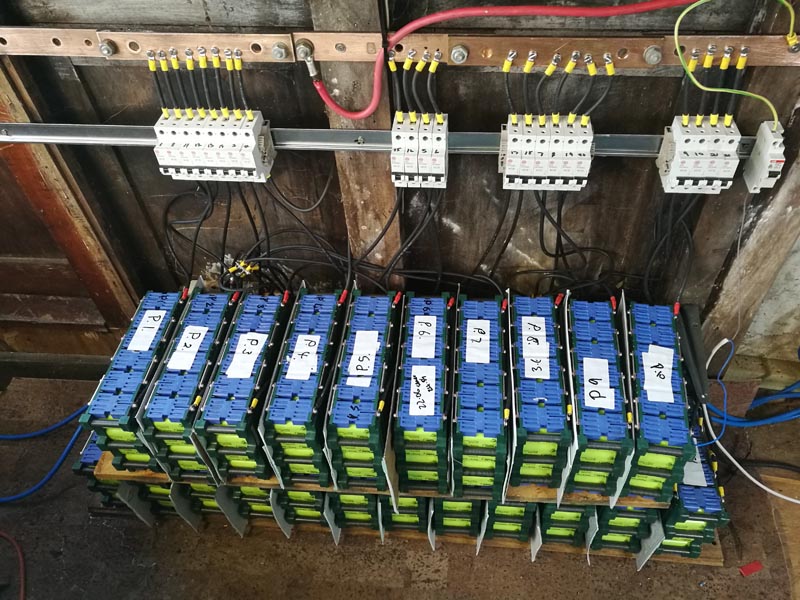
Batteries in test position
We now connected the battery cables and powered up the inverter and laptop then setup the parameters, all good so far, we tripped the shore power and the inverter kicked in as it should, we were pulling about 600 watts a quarter of its capability, so we carried on switching back and forth nothing flickered on the change overs, the next day we decided to go for the big test and at 12.00 we switched off the mains, and run solar/battery only for 24 hrs to see the effect on our battery bank, bare in mind our solar input energy is vary small at this time,
Testing
Anyway for the first hour we played around with different loads to get the inverter up to its max continuous power 2400 watts this we did with an oil filled radiator and watched the current being drawn from the batteries, the 140 amps or so was easy for our batteries but with our current pack it would last for only 5 hours but this was only a short test and we only expect to use between 300 and 500 watts an hour or maybe less, any way so far so good, the next day we had to go out so we left the inverter in battery mode we finally got back at 14.00 hrs when we switched back to mains supply, we then did some calculations to find we had only used 20% of our capacity which was far better than we expected, now the only problem we had was the inverter tried to switch back to mains power but it realised there was still no mains and switched instantly back to battery, I only found out why after reading the inverter logs, it thought it had reached the back to mains voltage so tried to switch, the software reading the voltage, battery wise could be a little better, anyway that’s a small gremlin to sort/resolve later, the next test started as soon as we changed back to mains power the inverters battery charger kicked in and started charging the batteries at 60 amps and we got a couple of amps from the solar panels, this got all the inverter fans running and the smooth speed control when the charge was near complete was excellent.
The next test was to set the inverter in solar priority mode in this mode you run on mains during the dark period and when the sun comes up the inverter senses the power coming and switches the supply from mains to solar/battery and when the sun goes down it switches back again, so once the solar panel are set up correctly we expect to run the boat and charge the batteries at the same time, so hopefully we will be able to run off batteries all night and recharge with solar during the day.
New Rack
As the batteries and system all checked out ok I needed to get the batteries, inverter and pc on to some sort of racking firstly to I can move the system around a little whilst I make good the wheel house which I hope to do this year (2018) the rack will most likely become the permanent home for the system, so I constructed a 4 shelf battery rack with desk and back board for inverter, battery selector test box and computer screen.
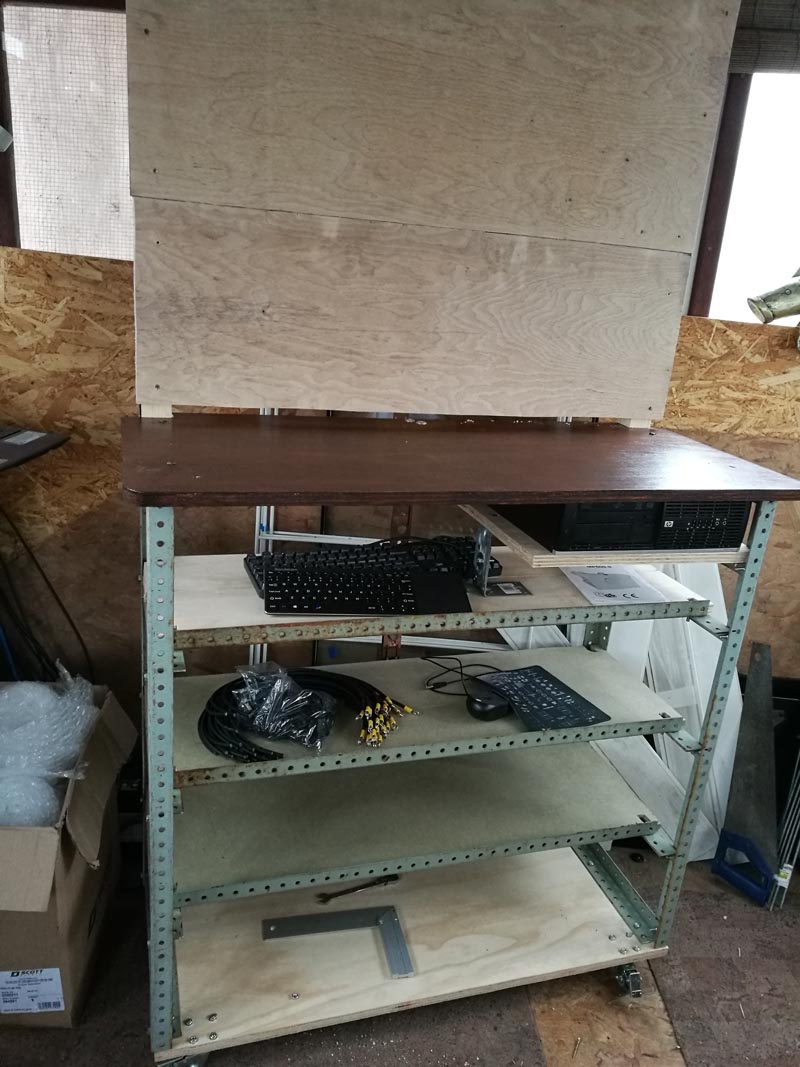
The trolly rack
The frame is made from predrilled angle iron from our local marine salvage yard and left-over plywood and a set of new casters, 2 with brakes, this all took less than a day in the workshop to build then it was dismantled and re-assembled in the wheel house.
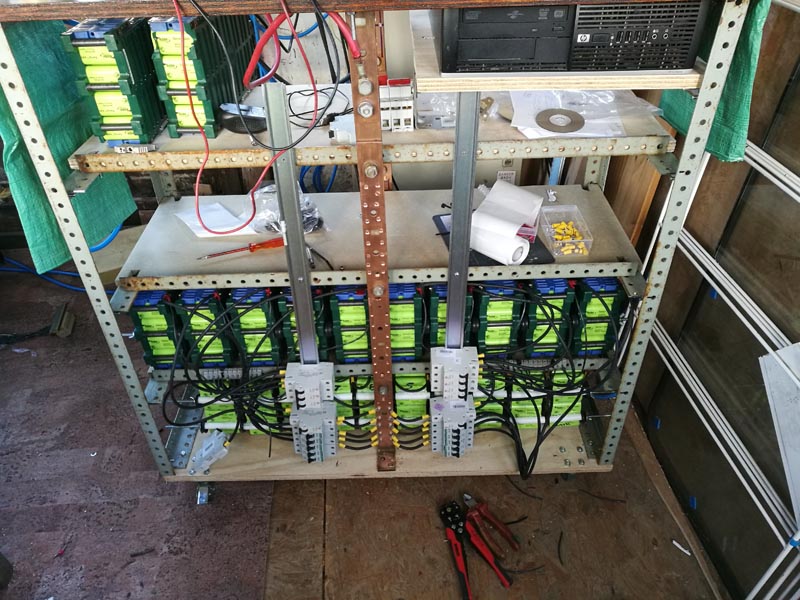
2 banks done
Building the battery banks on each shelf took time as each battery required 3 wires, four insulators, two of the wires positive and negative wires are cut same length (all batteries are the same length), the negative wire connects to negative busbar on the back of the rack, the positive wire connects to a 40amp breaker which is in turn connected to the positive busbar via a short wire, this enable me to isolate each battery or bank if needed and the breaker will stop to much current being drawn from each battery, the third wire will connect to my test box so I check each battery with a turn of a switch, as for the insulator the battery busbar are not covered so the batteries must be kept apart, because you get a big spark if they touch…..I know.
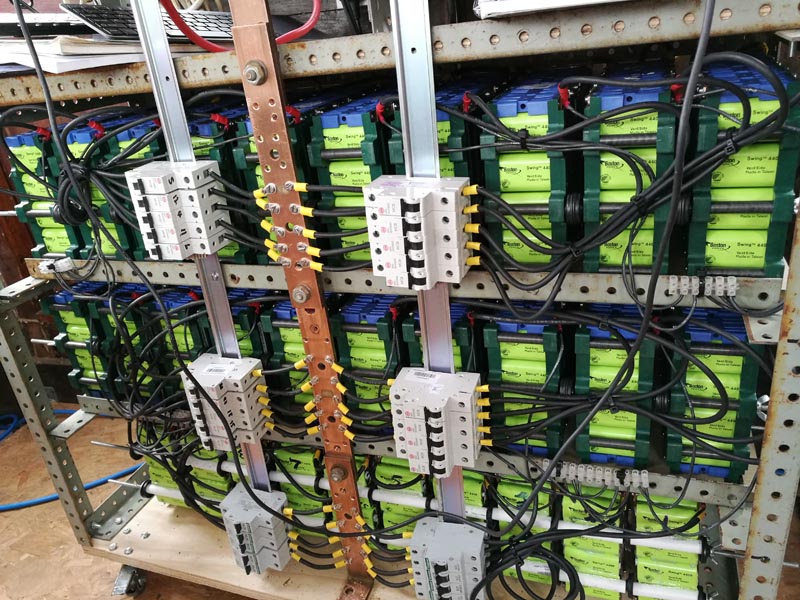
3 banks done
Anyway I found some nice insulators for electric fencing at my local farm supply store, the battery pack have tubes built into the ends which would allow threaded bar to be passed through, so it was a case of sliding 8mm stud bar through the first battery then add 2 insulator back to back then add the next battery and so on till all 10 packs on the shelf, wing nuts were fitted to the ends and tightened up this makes one big pack that strong and safe, this was done for two banks the third was similar except with packs not having cases I cut and glued plastic to the sides of the bottom bank, this all took a couple of days to complete, I then fitted the inverter onto rack, the 240 volt input and out I put on plugs with extended cables, this will allow me to move the rack around without unplugging it, new cables were made and fitted between battery and inverter,
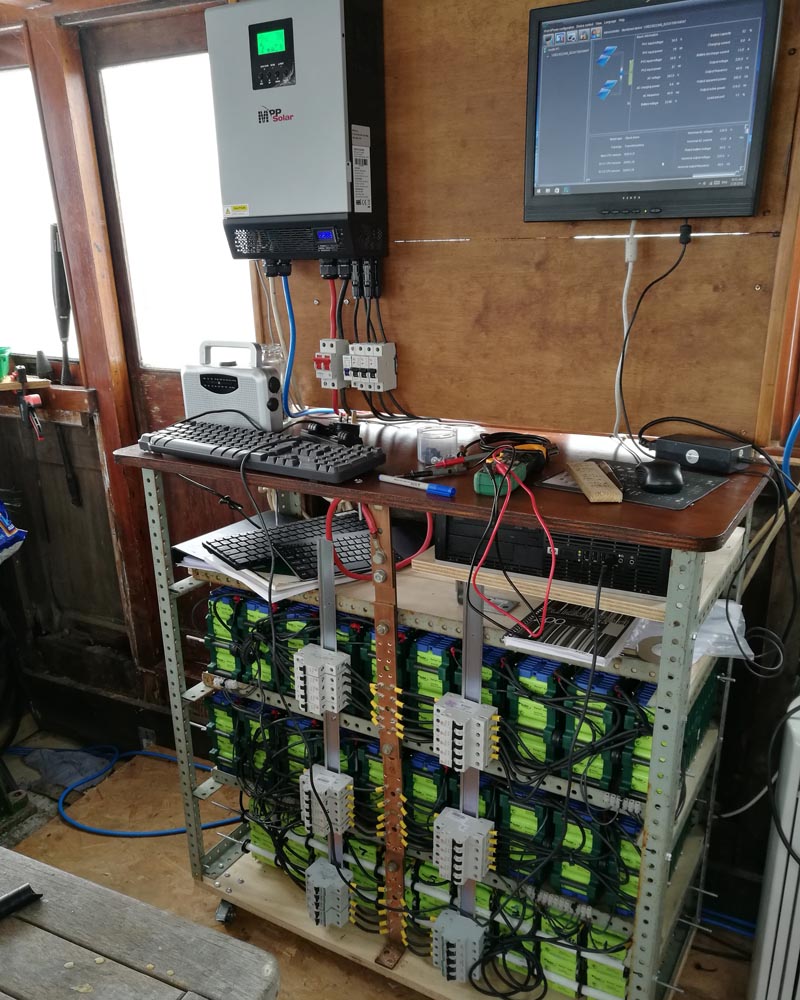
system under test
after a thorough check the system was put back on line, a couple of days later we recorded our best solar input at just over 1kw per hour for 4 hours our 6 solar panels that was over 2/3 of our capacity that’s 40 amperes per hour, the boat was using 13 amps that left 27 amps for recharging the batteries.
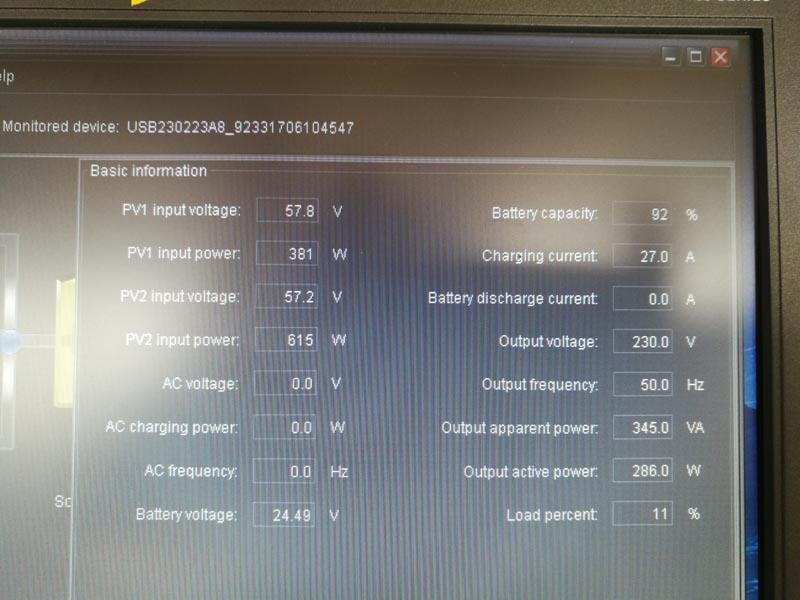
pv1 input 381 w pv 2 input 615 w 996w total
The next big test will be starting our main engine the batteries should handle just fine, I might try and record the event. I now have another nick name which is Battery man, but suppose that’s all I have done for the last 6 months or more….Happy Days.