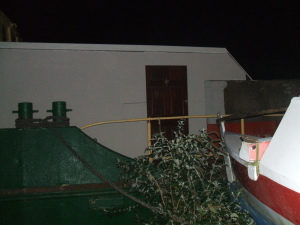
The Refit Begins
Wednesday evening of the 18th June I arrive at diction ready to start the refit, on Thursday the 19th Dave the AB arrived for a weeks working holiday, he was going to paint the exterior deck and housing however the weather was quite dismal for the time of year and it wasn’t till Saturday the weather brightened enough, however Dave got stuck in to the accommodation block removing rust and scale with a scraper, needle gun and rust eating acid, not a small task by any means. My self meanwhile got busy making a work bench, sorting tools, taking final measurements and getting ready to start framing the new upper floor which will have to support the lounge, galley and small bathroom an area of nearly 900 square feet of steel framing is required, this is with out the supporting frames and bulk heads (walls). This will keep me busy for some time.
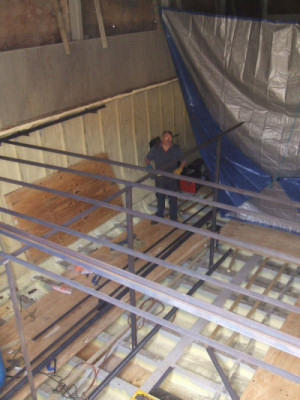
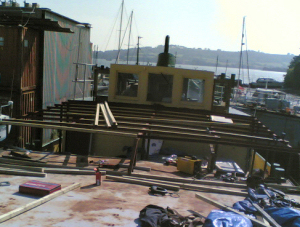
Fitting the steel work.
In the evening about 9pm we steeled ourselves away to the local pub for a meal and a pint or 2 then back to the boat to retired for the night. We would arise most days about 6 am have 2 hot cuppers each then started work, we would stop for breakfast about 9 o’clock and lunch about 2 o’clock.
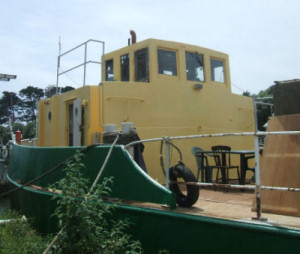
On Saturday the 21st the weather brightened enough for Dave to start his painting project starting with a 2 pack primer (two parts) this is special paint that has to be mixed as it contains a resin base which requires a harder to set it off but it is very good at protecting steel . Also the wife (jenny) arrived on Saturday to lend her assistance and to familiarize herself with the area, as we will be living here for a while, the shopping and cooking would now be under greater control with the lady of the boat in charge. Anyway as a way of resting after several hrs of welding I pressure washed the hull, from the quay side ready to paint the next day. Sunday continued like Saturday.
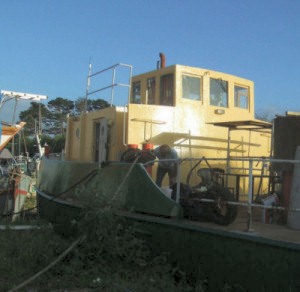
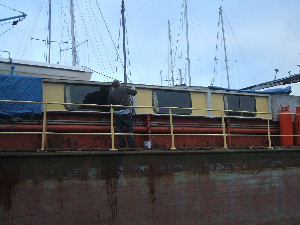
Dave Smith getting a coat of paint on the old girl.
Monday to Thursday carried on the a similar way with Dave getting the 2 pack finished then a coat of undercoat and finally a gloss top coat, I managed to paint about 1/3 of the hull and done about 30% of the framing.
Friday 12 o’clock we took Dave to the rail station and he went off with a packed lunch, (a couple of large real Cornish pasties) while jenny and I went to explore the Barbican area of Plymouth we had some nice fresh fish and chips, and brought some boat bits from a chandler. Saturday the 28th we made ready to leave, secured the boat, picked up some fresh pasties for a friend,
The following trip, July 27th to august 9th was very wet as it was in most places around the UK Dave again joined me for a weeks working holiday but due to the weather very little was achieved on the painting front but some prep work (chipping and scraping) was done between showers. On the construction side we faired a little better with the construction of the main staircase to the lower accommodation.
Building the staircase.
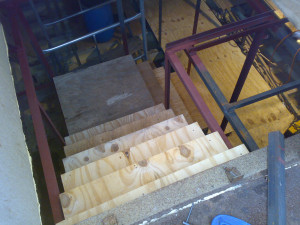
The first part of the upper floor was fitted (50mm x 50mm treated timber was nailed to the now painted steel frame work, then the 18mm plywood sub floor was screwed down to this.) The floor will be finished in 20mm European rustic oak t&g planking.
With the first part of the floor down we commenced fitting the upper shower & toilet. We got the 6 bulkheads fitted, the bathroom is L shaped hence 6 bulkheads) the ceiling/deck head was wire brushed, rust sealer applied and two coats of primer, this was then tiled and painted. We tiled 3 bulkheads with self adhesive tiles and painted the other bulkheads. Then the shower base was installed.
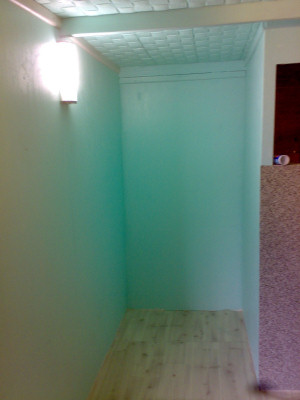
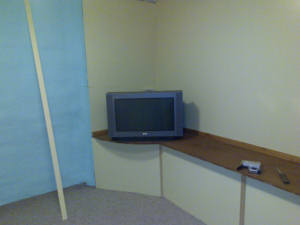
New temporary bathroom
We had now run out of time as our two grandsons are coming for a holiday and I will be back at work in a few days, so time to go back to sunny Wales till next time.
October
Sunday the 19th we set off for the boat again just jenny and myself and we arrived at the Torpoint ferry just in time to be held up whilst a submarine was sailing from Plymouth naval base. I felt a bit sorry for the crew lined up along the deck as the weather windy and cold with showers. By the time we got to the boat it was raining cats & frogs just what one needed to unload the car and trailer. The first couple of days where spent fitting a temporary central heating system. Using my old oil boiler, some cast iron radiators that I used in my old workshop and a Myson hot air blower that connects into the central heating system. This works very well as it blows warm air around the boat which helps to keep it dry.
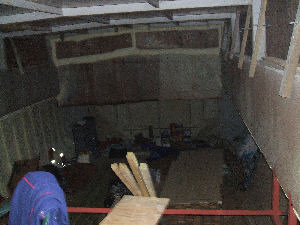
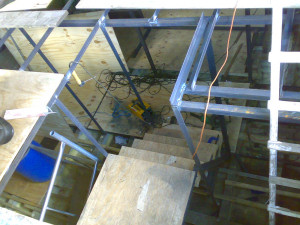
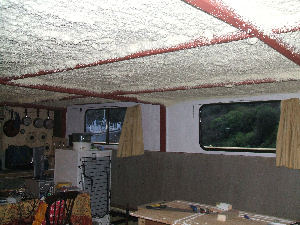
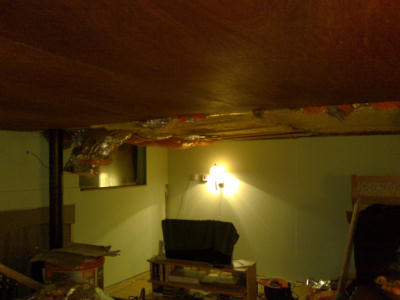
View from the new lounge floor into what will be the workshop.
Over the next 3 days I finished the remaining lounge floor framing and the plywood sub floor was laid. We also took delivery of our new patio doors these consist of 6 22 inch x 78 inch toughened double glazed doors. The frames and fitting will be made and or brought later. A timber wall has been fitted in place of the doors till the summer when hopefully the weather will be better. During the night we would switch off the heating to save fuel, but after one very cold night when we got up and found the steel roof frozen solid inside. This was condensation that had formed due to the temperature difference inside and out. As we now had a working floor fitted we could insulate the roof, we had planned to spray foam the underside of the roof so we had the gear ready to do the job. However the area is large and just a bit rusty, this was dried, wire brushed and painted with red oxide, all 480 square feet of it. My mate James and Julie his wife came down for a couple of days on business, this was Friday 31st and it was decided during a meal at the local pub where James & Julie where staying,
Jenny and Julie would go off shopping the next morning whilst Jim went off on his business for a couple of hours. Which left me to spray the inside of the roof alone, as this would be a messy job and it was also a first for me. It wasn’t too bad – it was just like spraying heavy paint and the hardest thing was to judge how thick you had it as the foams rises and sets very quickly, so you could just go over any thin patches again. 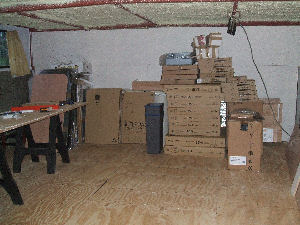
B&Q kitchen stacked ready for fitting.
James returned in time to hold the light so I could finish the last quarter. The difference in the room temperature was amazing with no more dripping water or cold spots and this will work well in summer as well as winter as the steel can’t get so hot so the interior will be cooler.
Spray foamed deck head.
After saying goodbye to James & Julie we carried on and made 2 more window inserts. This is made from 18mm hardwood waterproof plywood which was cut to shape (each window is slightly different) the window whole cut, the inserts where then primed under coated and glossed and left to dry. A timber frame work was fitted inside the existing steel work to take the inserts. The next morning the new boat window frames where fitted into the inserts, the inserts where fitted to the frame work and screwed into place then the 6mm toughened glass then fitted. We now have 3 windows fitted (one I had made earlier) and it’s starting to feel like a home.
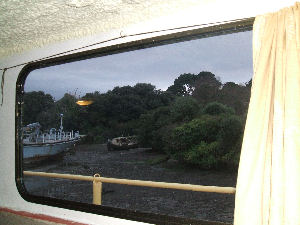
The out side world.
Window from outside
Its now time to pack up and head off home to Wales as it was time to return to work. A few other things that happened during our stay firstly B & Q delivered our kitchen after months of problems and still we had bits missing, however that’s a different saga!! we also took delivery of our new dual fuel log burner, can\’t wait to get that going. We got the toilet and shower working now we don’t have to leg it across the yard when you need to go!!!.
We have now put out house up for rental as a sale does not seem to be happening, we hope we can move down to the boat sooner.
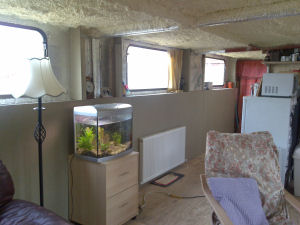
September With the weather set fine for the next week or so we decided it would be a good time to fill in the area between the wheelhouse and the new accommodation. This will enable us to go from up stairs to down stairs with out having to go outside and will also help to keep in the warmth. As the old accommodation is a bit leaky we also decided to fit a very temporary kitchen/galley The new galley is on order but will not be installed until all the new flooring has been laid and the windows fully fitted. Dave has not joined us this time due to me having to do extra time at work. So there was just Jen and myself.
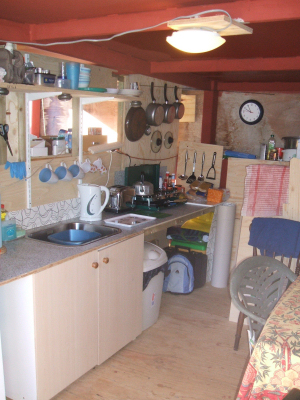
Temporary galley.
The week started well with fitting the temporary galley. We then started making up the frame work for the extension which was complete in a couple of days.
Extension frame work in progress.
During this time we had several deliveries of timber and other supplies. One of the deliveries was 50 sheets of 18mm hardwood ply and 20 sheets of moisture resistant MDF which the boatyard staff helped to hand ball on board much to our relief. Another of the deliveries was 70 square meters of real 20mm thick European rustic oak flooring, this is very hard wearing and has very nice grain. This has been stacked in such away as to allow the wood to acclimatize for a few weeks in its new home before being fitted. With the plywood on board and the frame work painted we fitted the studding to the steel frame work. This would normally be a long slow job, drilling and screwing the timbers in place however Mr. Hilti makes a cartridge fired nail gun which mean you can put 1” to 3” nails through steel frames into the timber(if you wish to see one in action do a search on you tube for nail guns). I purchased a secondhand one just for this very job as I have lots of framing to do and it only took 3 hours to do 2 days work.
With studding done we then lifted 9 sheets of the 18mm thick plywood up on to the new roof frames, 4 sheets where cut to suit the shape of the wheel house front and 5 sheets where cut for the front part of the roof then all the boards where screwed into place.
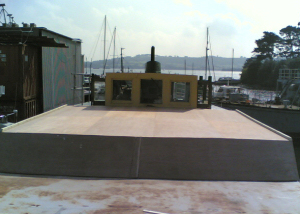
Plywood top
The next job was to score the nice looking ply so the fiberglass will stick to it. The ply was then given a primer coat of resin to soak into the ply; once the resin went tacky we then applied more resin then laid the fiberglass matting then this was left to cue over night.
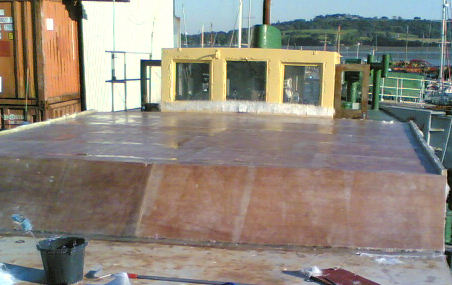
Plywood top fibre glassed
The next morning was a busy one as it was our last day and we had a lot to do. Whilst I was working on the roof Jen was busy priming and under coating some of the ply ready to be fitted to the new cabin sides .So I started putting the studwork to the side frame work ready to take the painted boards. Once the weather warmed up and the morning dew had dried off, I went up on the roof again to do the final finish topcoat.

Fibre glass top coated
The previous fiberglass was sanded down and dressed up as required, the top coat was applied this will seal the whole job and keep us dry. With this job complete it was time to erect the side sheets and the main entry door (this is a temporary door till I can make or source marine/ships doors).
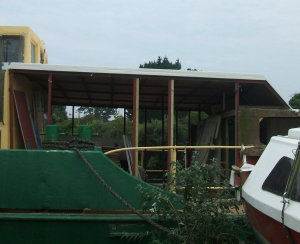
Extension with no sides.
extension with sides and door.
we finished at 10pm and then drove home about 4 hours. We had a good 8 days work with the result we can now work quite happily inside and not worry to much what the weather is doing, During our stay we had some more amazing wild life experiences. Our resident kingfisher uses one of our mooring lines as a fishing perch, we have a family of swans mum dad and two signets who come for supper every evening and often we watch a gannet chasing fish as he follows them in with the tide. These are just a few of the examples of the things we have seen around our new home and why we can\’t wait to get down there to live.
Jan/Feb 2009 This trip was a bit manic due to having to move onto the boat as we have now rented the house out. Before we could move onto the boat we had to renew the central heating pipe work and radiators as they had been damaged by the recent frosts. Thankfully the oil boiler survived, steel ships can get very cold when left for long periods with no heating.
Lounge in progress.
We did a self move as access to boat is not the best at this time of year. A luton van was hired, we then did 3 trips to and from the boat about 450 miles round trips and by the 19 Jan we were living on diction.
We will be roughing it a bit to start with but as we are living there full time I can hopefully get a lot more done.
On 25th and 26th we had our first visitors four of Jens family David & Gayle from Australia in the uk on holiday and Bill and Rosa from Norfolk, on Saturday evening we joined them for a meal at a pub local to their hired pad.
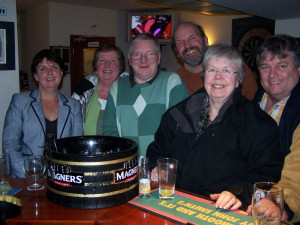
The family
On Sunday we escorted them over to the diction for a full english breakfast and a tour of our fine vessel. For lunch we had traditional Cornish pasties; we relaxed during the afternoon opened a couple of bottles of wine. We went for an evening meal at our local, the Carbeile Inn. Later we returned to the boat for coffee and then said our good byes.
The next couple of days were spent getting a few jobs done as I would be heading back to sea on Wednesday leaving Jen and the cat to fend for themselves.
on my return we commenced framing the outboard side of the galley/lounge area so I can start to install the new galley (kitchen) now that we have finally got it all on board, not bad really, only 6 months from buying the kitchen to getting it all in one place.

Insulating inside.
March 2009 This time would be my first full 3 weeks on the boat, the first job was to get the log burner fitted, this involved positioning the fire central to the base, drilling the four legs and drilling through the tiles to secure the stove to the 36mm wood base, unlike houses a boats tend to roll. We then waited a couple off days for a dry day as I had to cut a 6inch hole through the roof and frame above the stove, I had pre made a insert made from a section of pipe that would need to be welded into the hole and re-bridging the cut frame, the normal stove flues are a bit tinny so we sourced a 10ft length of heavy walled 5inch pipe, which we slid down from on top the roof through the bridging piece (insert) and down through the normal stove flue pipe, this gives the stove the correct finished effect, the flue was all sealed up ready to use the next day.
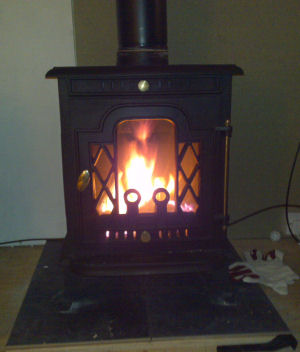
7kw log burner.
Whilst I had the welding gear out I welded an 8ft length of scaffold tube onto a shipping container close to the boat so we could get a sky dish fitted, this was done a week later.
The next job was to fit a new hot water cylinder this was a stainless steel job designed for mains pressure up to 3 bar pressure but as we can have up to 7 bar on the site I had to fit a pressure regulator set at 3 bar, the tank was supplied with a separate expansion tank and tank thermostat which were all fitted, the thermostat was connected to a new programmer for the heating and hot water, the system is now complete with lots of piping hot water for showers We then started on the first lower bedroom as we decided that the current bed room on the top deck was a waste as we really needed a office /study and as the current room had excellent views we thought this would be a good move.
We started with adding 200mm glass fibre to the outside bulk head although the ships side is already foam insulated we have found that as the frames were not completely covered this still made the boat very cold in the winter and in the will make it very warm in the summer. The two end bulkheads were fitted previously but needed to be finished and the inner bulkhead needed to be made this would need to have a door and window fitted, the remaining bulkheads were also insulated with glass fibre all interior bulkheads were finished with 12mm water resistant MDF and primed ready for painting, the space above the deck head/ ceiling was insulated with 50mm foam boards, we then fitted the ceiling which is white PVC planking which was intended for the lounge but due to the smoke that the log burner can generate when you open the door we decided white was not good so we will do something else here instead, the top section of the outer bulkhead was wall papered the electrics were finished a small radiator was plumbed in and the door was hung and frosted window was completed, the last job was to lay the carpet, the room was finished.
We moved the bedroom furniture to the new cabin, with what is now to be the office empty the under side of the above deck was treated and spray foam.
The outer bulk head was also treated and foamed and clad with 12mm water resistant MDF, the bulk heads were primed then painted. I was again running out of time so the deck head/ceiling frame and PVC planking did not get done but we laid the carpet and moved the office stuff any way to clear the lounge as I want to get on and finish the galley/kitchen on my next leave, whilst all the above was going on we also moved the temporary kitchen to a new temporary position which leaves the lounge clear also the very poor electric shower unit was removed and a new mixer unit and rain shower head fitted ,,,,,and it’s eeeeeexcellent, steaming hot showers at any time.
Having already moved the temp galley last trip we started with a clear space, firstly we removed some of the wall cladding so we could add more insulation. The frame work and cladding around the window were finished; the cladding was then primed and painted. Next we laid the new oak solid hardwood floor, the under side was treated with wood preserver and the finished floor was oiled, this really brings out the luster of the wood.
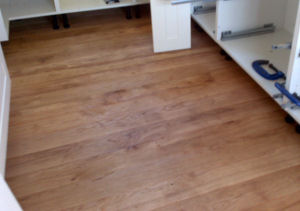
Hardwood flooring European oak.
The next job was to put the galley units frames together and to secure them to the bulkheads, this is quite important as we don’t want the galley to go walk about’s when the boat rolls!

Installing galley cabinets.
This was about the time the wife disappeared for a week to visit the grand kids and to give me some peace and quite, Ha Ha!!. Anyway with everything secured it was time for my least favorite job the galley work top and breakfast bar. At least I had the right tools for the job with a router to machine the board and a template to cut the joints but it was still a pain to do. This done it was then secured and a hole machined out for the new sink, the sink has a linen finish and as we have found before it doesn’t show scratches or finger marks like the plain sinks do.
The next job you wouldn’t normally find on a boat due to the twisting and bending movements of the vessel which can be considerable and that is kitchen tiles which can break and fall off, but thanks to a product called Sikaflex this can be over come. Sikaflex is a flexible adhesive and it’s strength is excellent, in fact I hope I never need to change the tiles as I will need to remove the cladding they are stuck to. To give you an idea a friend we will call Tim decided to stick down the loo in his boat using Sikaflex Recently he decided it was in the wrong position and went to move it, after much heaving and sweating and no doubt swearing the loo finally came free, but with it came away half the floor it was stuck to, he was not a happy bunny.
With the tiling complete, finished with cream coloured grouting to match the kitchen units. I then made a widow shelf with the oak flooring, the ceiling in galley was framed electric light cables run and ply sheeting was fitted and two twin electric sockets fitted.
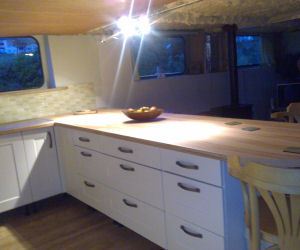
Galley complete
Next was the cooker hood it was fitted but the ducting still needs to be completed that’s One for next time, next I fitted the new cooker, this is a canon LPG gas cooker and has a flame failure device, this is to comply with new marine standards and for our own safety.
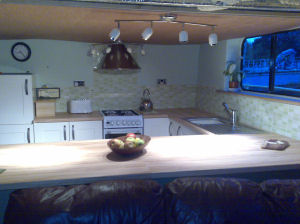
Complete galley
Next I assembled and fitted the door and draw units, we are not fitting any plinths but we will be changing the units feet, the one’s we want are out of stock at the present, next we connected the lights, the new fridge freezer was delivered and installed.
We bought a boat its a 21 pilot dory with a 70 horse power mercury outboard motor. Both engine and boat needed some TLC before launching and being able to be used. This was done which took about 3 days, the boat was then launched and tested.

Jenny B launch
She runs very well and fast, ideal for fishing and investigating the local waterways.

Leaving for test run.
We have decided to call her Jenny “B”.
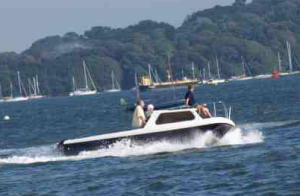
Doing about 20knots here, speed limit is 10.
The rest of the leave was spent clearing out a container we had rented to stow some of our gear whilst we moved to Plymouth.
The main job for this leave was to build the walk in closet so Jen could unpack all those clothes that have been in suitcases for so long. The closet was done much the same as the main bedroom, except the room was just painted and shelved out. The room is complete except for the door, which will be added later. A few other jobs like the vanity sink in the shower room was plumbed in, and other odds and ends. We now have light switches in the bedrooms and clothes closet!! Little things mean so much!!

Closet full.
next we need to get our grandsons room built ready for their visit in August. This required the re-piping of our waste water system which meant we had to cut two 50mm holes through the ships side. This was achieved using our plasma cutter (a plasma cutter users superheated high pressure air to cut through all types of metal but is cleaner and safer than gas cutting) but this was near to it’s cutting limit, as the steel hull is 10mm thick.
Start of the boys room.
We already had one wall erected, this is the dividing wall for the boys room and the spare room. With the pipe work sorted we then laid the floor frame work and the 18mm plywood flooring. This done we continued to erect the second wall. This is the for’ ward wall where the bunks will be built onto.
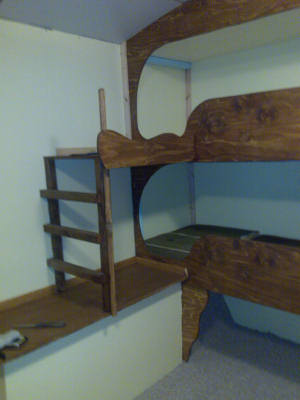
Boys bunk beds and ladder.
The out side wall was again insulated over the foam with 200mm fiberglass insulation. frame work was then built and clad with water resistant MDF. The last wall is the bulkhead between the engine room and the bedrooms, which has 4in foam insulation on it; we decided just to paint this. We then set to making the bunks and access ladder to the top bunk, the bunk sides cut out of sheets of ply using my trusty jig saw, then stained. The bunks have been fitted with Ikea bug lights and have little port holes at the end of the bunk which will have little pirate flags to cover them. A wooden anchor was cut out of plywood and has been hung on strong twine through a small rope sheave so they can raise and lower the anchor. The ceiling frame work was then fitted and the ceiling was then clad in white plastic cladding with two low energy ceiling lights fitted and wired up.
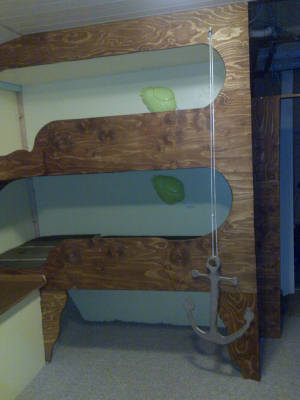
Bunk beds with anchor.
For door we decided to use one from the old accommodation as is a lot smaller than house doors and quite suitable for the job – a little door for little boys. The bottom half of the dividing wall was clad in wood grain laminate flooring and top half was stained. Giving the effect of a “Pirates Cabin”.
We also clad the stairwell to make it child safe and laid a stair carpet. The room was then carpeted.
September, due to one thing and another we didn’t get much done this time however we did make a proper gangway to give us safe access on and off the boat.
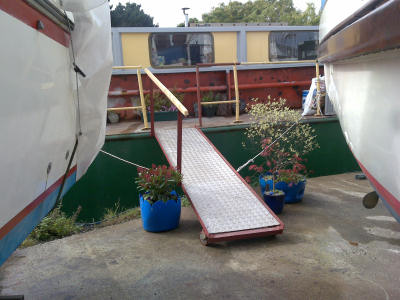
New gangway
Apart from this just a few electrical jobs got done. We also enlarged the log burner hearth, this was brought out another 6” and was widened by 12” either side (somewhere to put the fire tools and logs etc.) we then tiled along the back of the log burner as this is to be the backing of the fire place which will be made later.
November, this leave was a bit more fruitful as I wanted to get as much of the lounge completed before the Christmas leave. We started off having to sort the workshop, new shelves were made so we could clear the work bench and get the router table set up. With the workshop now ship shape it was time to start on the port side internal window finishing; these where made in four sections and machine to give a patterned finish around the window it self. With these done and painted we then machined the window sills from the same European rustic oak we are using for the main floor which will match in quite nicely, the sills were then oiled to bring out the colour and texture of the timber.
With the window sills done the upper wall panels were made and fitted, these have been designed to hide a good portion of the curtains when the curtains are open; this also gives us more wall space for the wall lights and any pictures we wish hang later.
Before we can proceed with the deck head/ceiling we removed the three panels we had fitted earlier as we decided to extend the galley tiles higher up the wall, as it will make cleaning the walls easier. We also needed to add further insulation to the deck head/ceiling as a good amount of our heat is lost through this large steel area.
With the tiling redone we ran new lighting cable down the port-side of the lounge ready for fitting the wall lights once the deck head/ceiling was in place.It was now time to batten the steel framework with treated battens, this was done as we put up the 200mm fiberglass.
we used the space blanket type as is was easy to use and not so messy. With the deck head framed and insulated we oiled each deck head panels and fitted them into place.
Fitting deck head panels and further insulation.
With the deck head in place we painted and fitted the wall lights, these are made of unpainted ceramic which means you can paint them the same colour as the walls. They were designed in a way which allows them to reflect light up and down and use a low energy 7 watt lamp. We then replaced the galley light over the work top with a round version with only 3 down lights which looks much nicer than the previous bar type we had fitted.
The last job for the boat was to fit some light switches in the lounge and workshop. Luxury after the extension leads and plugs its amazing what a difference little things like a light switch makes!!
That’s it for 2009 see you in 2010.