2014
well we didn’t get much done this last leave, we started off by sorting the workshop out which had become a little untidy and we needed to clear some space to enable us to work. Also we had to make space for other bits and bobs we have had hidden away elsewhere which needed to be cleared.
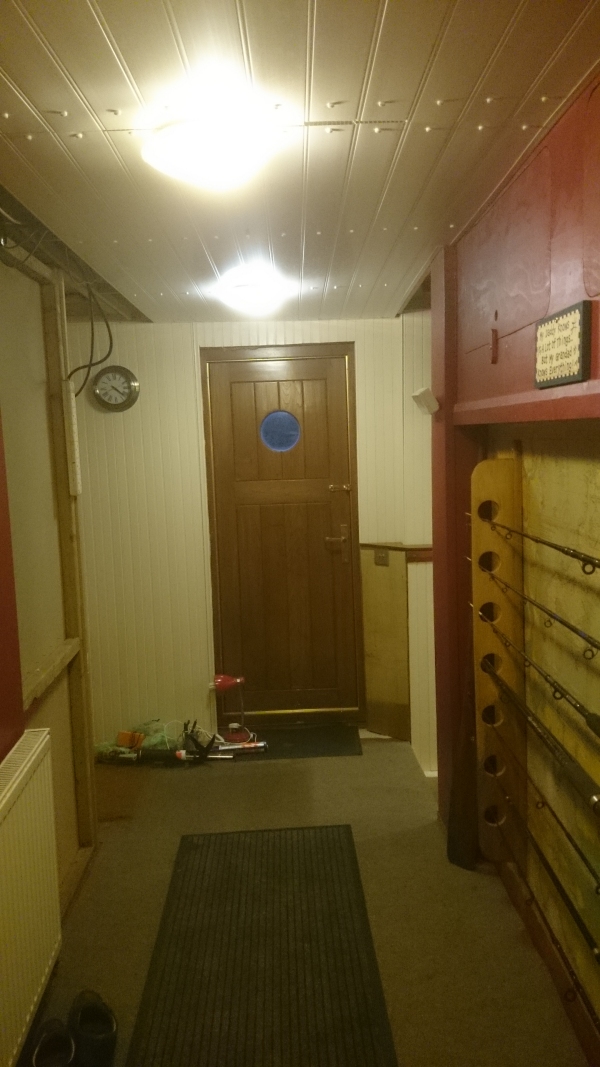
However we did some work done in the main hallway an area between the lounge entrance and the stairs to below decks, a space where the fishing rods have been living, it needed to be done properly.
So the fishing rods sorted, the old ones put away and the good ones put to one side, the old tool hooks that held the fishing rods will find use in the workshop no doubt.
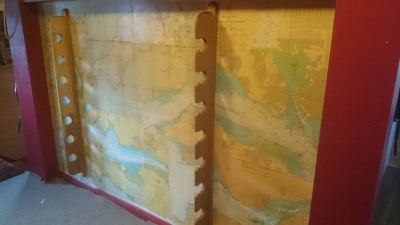
We then remove the 2 plywood panels we the re-framed the wall to support the plywood panel correctly and to support the new rod holders. These we made from our stock of European Oak, machined and oiled as we normally do.
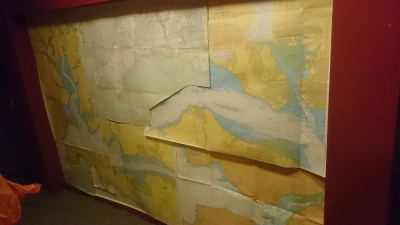
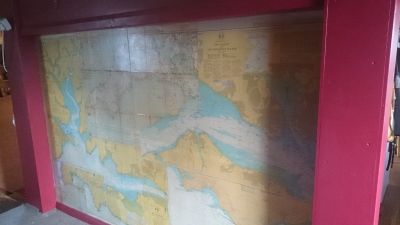
The plywood panels where refitted, we covered them with old nautical charts pasted to the now wooden wall, once it had a coat of PVA Glue, then allowed dry the charts where given two coats of varnish to further age them and also protect them, the surround area was then painted maroon. We also fitted some smart LED lighting above the fishing rods to illuminate the maps with soft lighting at night – very effective.

Once everything was dry the new rod holder where screwed in place and the fishing rods placed back, ready for when the weather gets better.

The following trip we got started on building a new closet as our other one was a bit on the small side and the old closet was to be transformed into a single cabin for when the grand children come visiting they are now big enough to have their own cabins.
The room we would be using for the new closet was a large room empty space that would need completely fitting out.
It was decided that as the room was so large we could partition a part off for a small store room.
This room is also a bit of an experiment, as we would be using plaster board for the main cladding we already have supporting timber framed walls that joined other rooms, only two walls weren’t clad with any thing except spray foam, the after wall was to be just painted, the outer wall had to be framed and panelled the next wall forward wall was insulated with rockwool light cables run and then plaster boarded was fitted. Next we moved onto putting up frame work for the store room, to maximise space the door was fitted across the corner, see plan.
The frame work was clad and plaster boarded and joints taped, we then fitted 3 wrap around shelves made from 25mm x38mm tanilised timber, in slat formation..
We then fitted the frame work to take the white plastic t & g we have used in other rooms, the rest of the lighting cable was run in, we then plaster boarded the last wall and fitted the ceiling/deckhead, this included the store room. We also had to leave a service space to get at the plumbing for the bath room and utility room, here we made a wooden drop in hatch, this works by putting the hatch cover up though a purpose made hole then lower board into place, no hinges or catches to worry about. With this done the light fitting were fitted and tested, the room was the painted. The radiator was removed prior to the work being done, so we brought and fitted a low profile radiator, this would allow us to fit storage racks around it, we then laid then vinyl flooring.
————
June Time.
With the old closet stripped of shelving ect, it was time to convert the room into a cabin
We decided I would build the desk and bunk into the room so it is fixed, we started with the bunk this was made to look like a proper ships bunk it was made of only two panels of 18mm hardwood ply, one on the side with a drop down front panel cut into it, to be used as a under bed store, and a end panel, the base for the mattress was made with 2×1 planed timber slats, next it was time to make the desk this again was to be made from 18mm hardwood ply, this was fashioned with a nice curve along the front, as it was a corner/ L shape desk it would look daft with an L shaped front, both the bunk and the desk were now sanded, then the varnishing started first two coats were 50/50 varnish and white spirit, the next coat was 75/25 varnish and white spirit, every thing was sanded down the next two coats of varnish were pure varnish, this gave a nice rich deep shine.
The next task was to wire in the bunk light, and the then the room was then painted.
The last job was to lay the vinyl flooring. This must have been the easiest we have done; it has been done primarily for our second grandson Sam, for his summer holidays but is available for guests at other times.
It’s been a fairly productive year so far the grand kids have now had their holiday a great time was had by all, except for them getting poorly the night before our joint birthday bash, however they recovered quite quickly and the bash went ahead. This again was a very good night with most of the Aqua pikeys from the boat yard turning up and staying late even the rain couldn’t spoil the evening.
These house boat people (aqua pikeys) do like their food and drink especially my special punch!!!.
It’s now time to go back to work.
———–
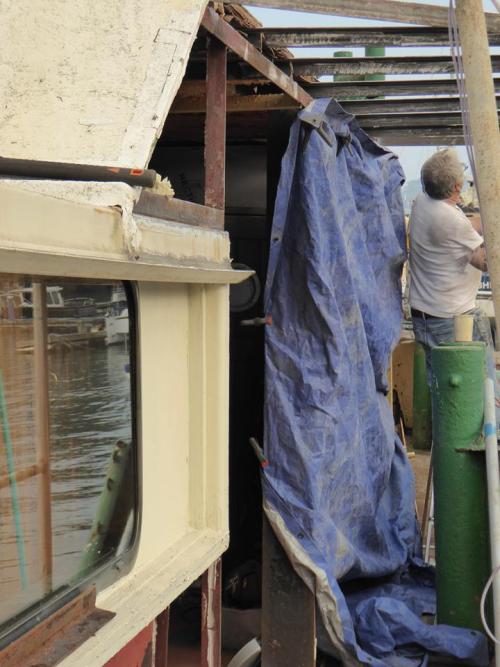
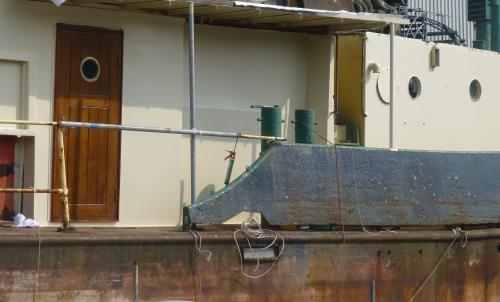
Well it’s September now and with a spell of good weather forecast it was time to replace the delaminated plywood on the port side with steel plate and fit the new door, this is the same job we did last June but on the other side of the vessel. We started off ripping out the old plywood removing the timber frame work and some of the steel uprights next we cut off the edge of the top deck, to allow access to the deck frame work so we can extend it to make a covered companion way.
A new steel frame work was made from 50mm angle and supporting stanchions from 50mm steel tube, some of the old hand rail had to be cut out to make way for this, a temporary rail was fitted, the new plywood boards for the deck extension were cut and painted with two pack primer. While these dried we continued on cleaning up the steel work ready for welding,
the steel plates were de scaled and cut to shape, 3 x 8ft x4ft plates and two 8”x 8ft plates would be required, plus various lengths of angle.
Back to the upper deck/companionway cover, the steel work had been prepped and primed the now dry boards were glued into place using a modern PU adhesive, these modern glues are very strong. Anyway with the boards in place the old fibreglass deck was ground back so the new glass would adhere to the old, the deck was laid up with two layers of 450oz glass matt, once cured it will be completely weather and water proof.
Now if the weather turns we can just throw up a tarp to keep the worst of the weather out and allow use to keep working. As the weather was so good and a mate from work had come over from Plymouth to give us a hand we decided to fit some of the remaining fibreglass window panels that we had made last year but not had chance to fit.
So we cracked on and stripped out the first two windows cleaned up the frame work, then cut the panels to shape the panels were then glued into place using again the PU adhesive. With the panels in place and glue set, only takes a couple of hrs to go off full cure 24 hrs we then fitted the windows back in again glued but with the addition of screw set in the side of the frames. With these done the next day we did the galley sliding window this the same as before except had to be secured with screws screwed into a recess on the front of the frame then gets a rubber protective cover.
We still had one window to do but this have to wait as we wanted to get the steel panels tacked into place and temporary fit the door frame and door, as we would have to down tools for a few days as we are having Family visiting from Australia for a couple of days , they were on a quick tour of uk and Europe we all had a great time had some great food, drunk some good rum, pity our car let us down but never mind all was good in the end, more family from Australia coming next year.
Back to the job in hand with the family on their way to meet up with their daughter we carried on and commence the task of welding all the steel work.
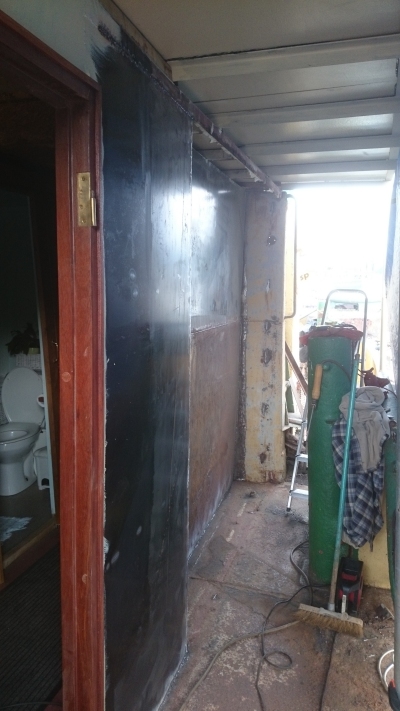
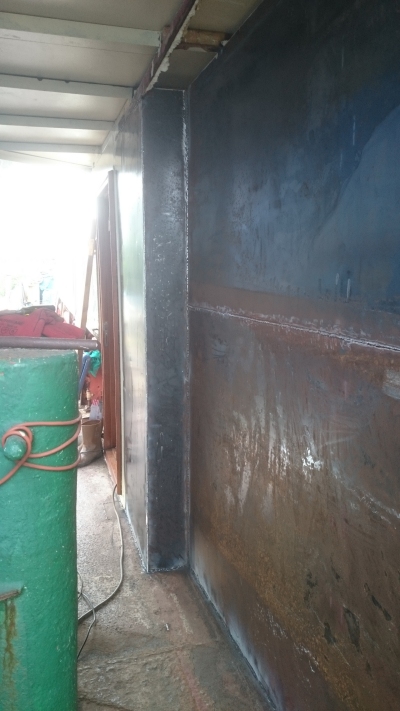
The door was removed first and the steel here was welded first as the welding was going to take while we wanted to get this part done so we could get it treated and primed with two pack primer. We have now gone over to using Jotum paints the previous paint we used seemed to be a bit porous, the two pack primer is a bit slow to dry but other wise should be ok, the topcoat does not need a undercoat and goes on great and dries quite quickly and on test on the old paint work does not react to it.
The steel work was treated for rust with Navatan 2006 this is made from tanning and latex liquid rubber,
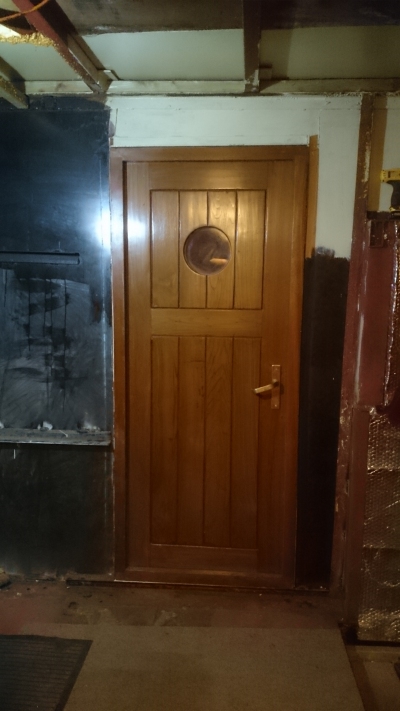
the tanning inhibits the rust and the latex seals it to keep any moisture out, any way with this done the area was primed and top coated, the door frame was then glued in place then screwed in on the inside, the door was then hung.
The rest of the welding was completed over the next few days; the steel work was then treated and painted as before we also painted the old part of the accommodation that we had joined on to so it all looks like one which of course it is now.
————-
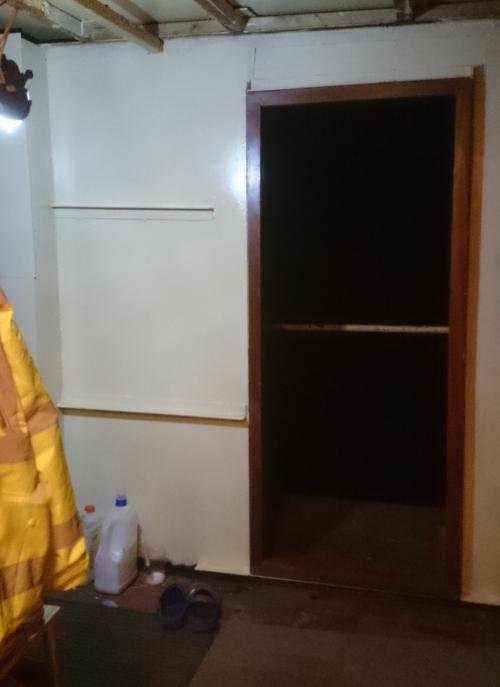
Having arrived back from my ship it’s time to get this part of the job done, we kicked of by getting the plasma cutter out and cutting a hole for the new port hole window that will be facing the bathroom door.

with the hole cut the window was glued in and a piece of plywood was cut and fitted over the window on the inside, the steel bulkhead was then framed and 50mm foam insulation sheets where fitted, a box section was built around the window the bulkhead was then battened and finally clad with T&G, this clad has been double machined so looks like to narrow planks instead of the normal one, wish we had found this before.
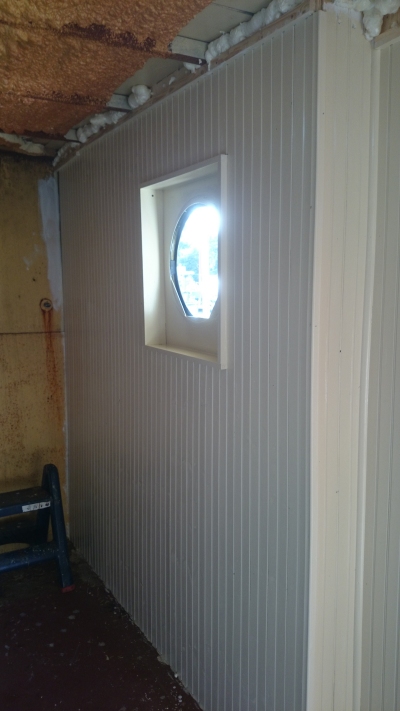
the cladding was the coated with primer/undercoat then given a coat of Jotum pioneer top coat.

and I’m afraid we have run out of time for this trip
——–
This will be the last work carried out for 2014, as I’m away over crimbo, it is our plan to try and complete the hallway that’s bulkheads clad and deckhead finished, but that’s a tall order.
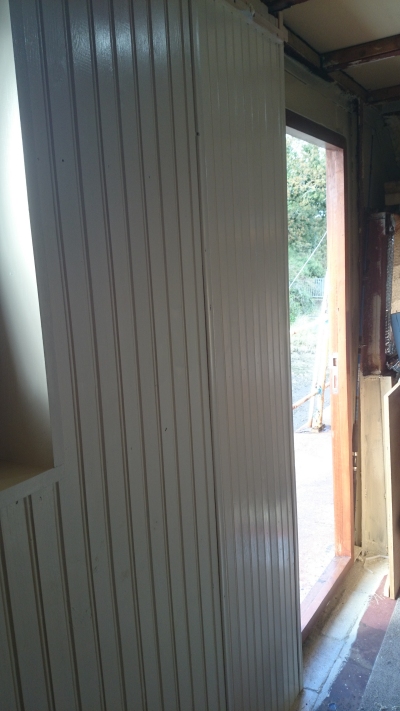
firstly we framed the bulkheads with tanilised 2 x1 battens,
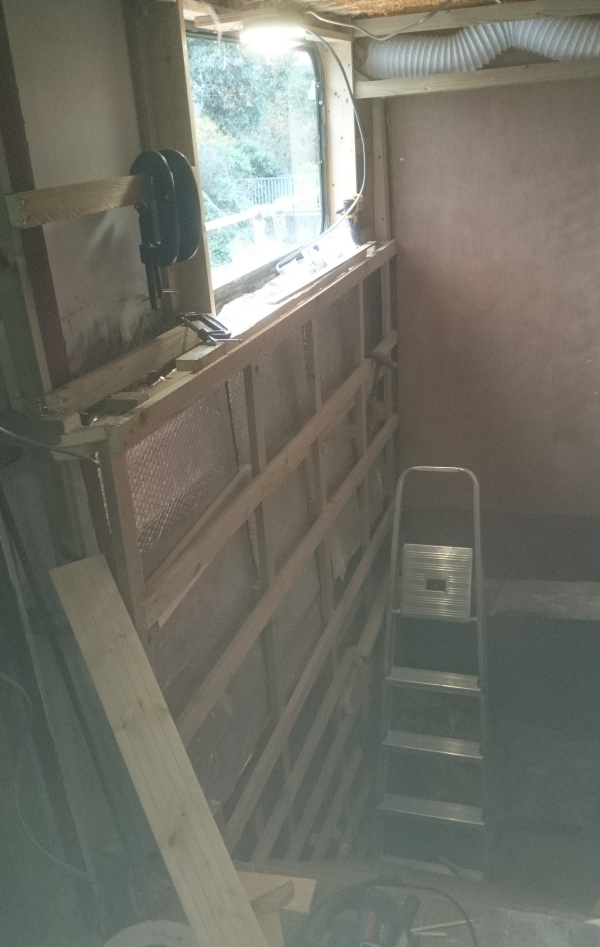
a internal frame was fitted around the window to box it in and framed ready for cladding,the electrics where then wired in and tested, this included a two way switch’s for the stairwell lights, and a ring main finished off for the office and galley and for the port side deck lighting, also we finally fitted the extractor unit and piping for the galley cooker.
Behind the cladding we then stuffed rock wool insulation into every crevice.
We the proceeded to clad the frame work with t&g sorry didn’t do any photos of plain cladding i get carried away once i start work.
With the the two bulkheads clad, these where quickly primed with a primer undercoat and then top coated with jotum top coat, vary fast drying paint, we use this paint both in side and out it is semi gloss and easy on the eye, and can be re coated with out need for further under coat, just a light sand and off you go.
we wanted to get it all painted before pitting up the deckhead cladding which is the white pvc that have used else where in the boat.
the deck-head for stairwell and hallway was framed this included part of the hallway we had already done with thin ply but we liked the cladding better and we needed to modify some existing wiring so it worked out quite well.

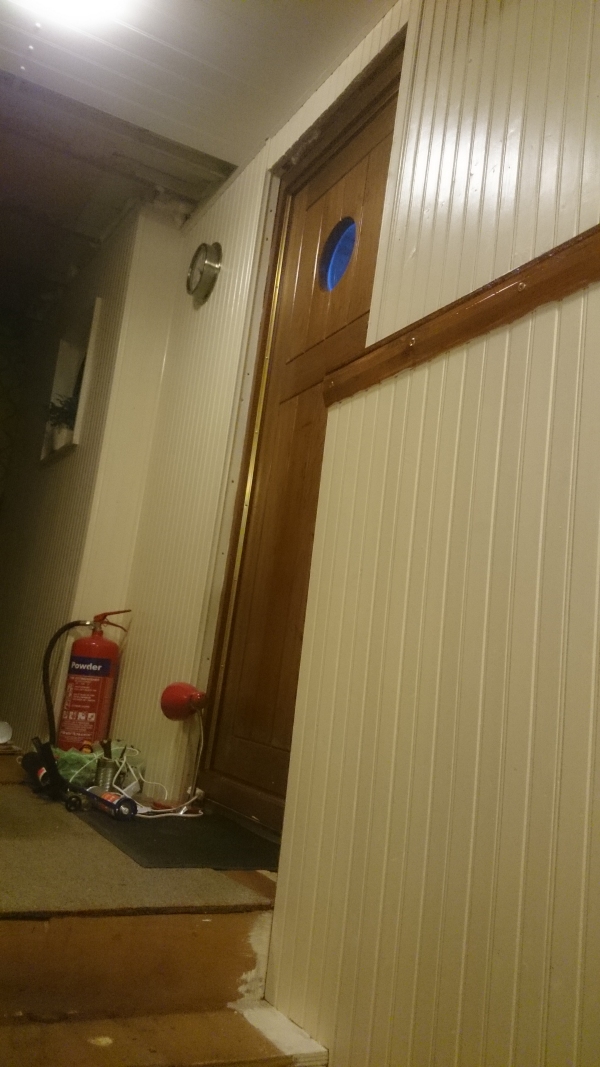
The window shelf was then made, stained and fitted, and given two coats of varnish.
Next we cladded the deck heads, once you get used to this stuff it’s easy to work with just screw through to the frame work using wood screws and plastic white caps, and looks quite good when finished.
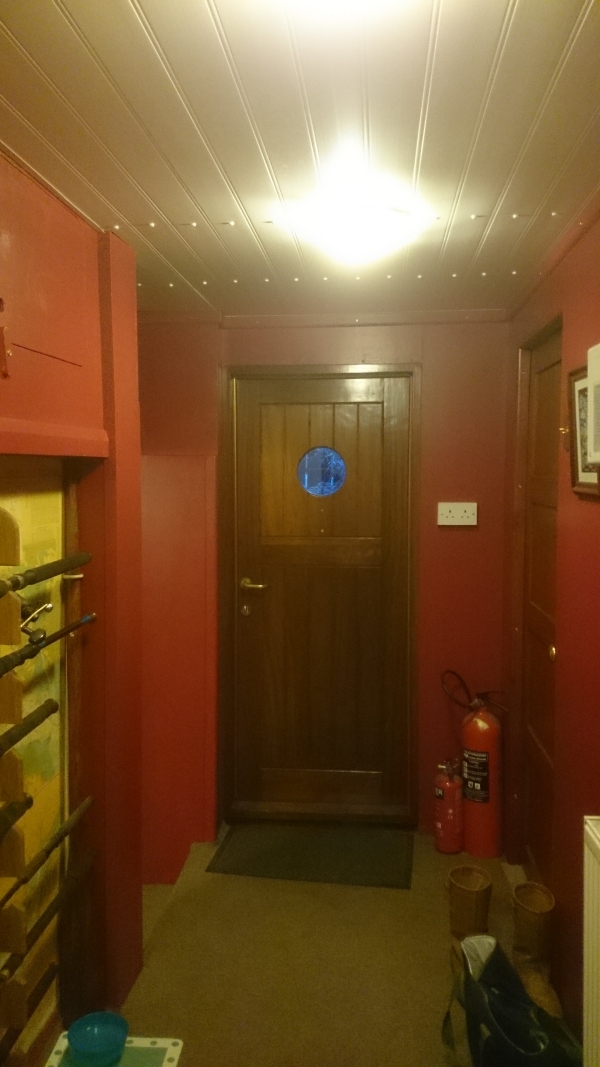
The picture you can see on the stairs originally painted by a very dear friend, this was ok when we lived in a house with lots of walls to play with, but we are a bit limited on the boat (as big as it is) any way that’s it’s new home.
Any way we have run out of time again as per norm, as the pictures show we still have some finishing to do but the back of it is broken, and the boat feels a lot warmer.
Have a great 2015. Jenny & Geoff