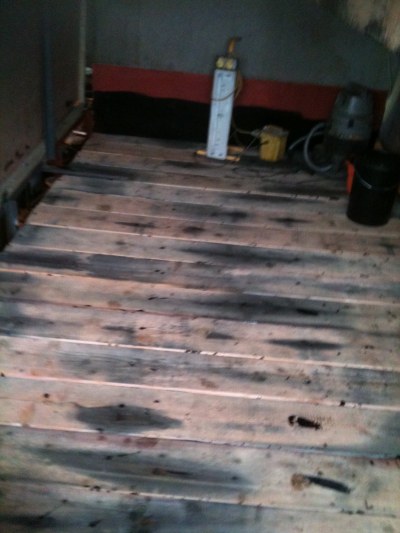
Jan/Feb we started on the first stage of the patio, we welded and painted the steel frame work,
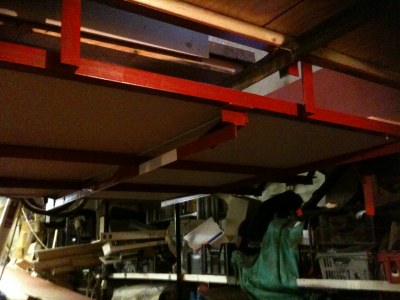
we then painted 5 sheets of 12mm ply both sides these were then bolted to the frame work, theses will stop any water getting through any cracks that may appear in the main boards, the deck timbers were then cut to length and a camphor was machined both sides so when the boards butted up to each other it would leave a nice groove to fill with deck chalking, as we fitted the boards both the ply and the bottom of the boards were liberally painted with a rubber damp proofing membrane these were then bolted down into place,
this last trip home I intended to carry on with the patio but the good wife thought we had a leak as water was running down the wall paper, in the master cabin but after various tests we found it wasn’t a leak but condensation, this was traced to the lounge window frames which are aluminum , and as we had curtains up we didn’t notice how much water was being generated, after some thought on how to insulate the frames we came up with the idea of insulating with upvc trim and found a local company who could supply a wood grained 20mm & 50mm strip the 20mm strip would have to curve flat around the window frames, we then made a former from plywood, then using a hot air gun semi melted the strip around the former, this worked a treat, the 50mm strip was glued to the bottom of the frame then the formed 20mm strip was glued into place, bingo no more condensation. I had gone thus far with the starboard windows we decided to make an effort to finish that side of the lounge as the port side was mostly done,

so got on with finishing the wall panels between the windows, extra insulation was added where required,
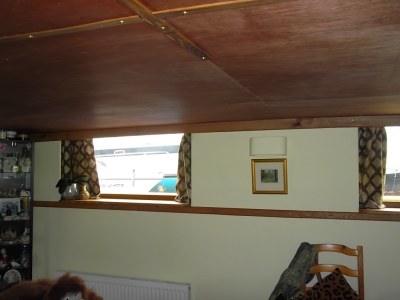
we then made new window sills, top and middle trim from European oak to match the rest of the lounge The electrical cabling was completed, including the wiring of the fire alarm Smoke detectors.

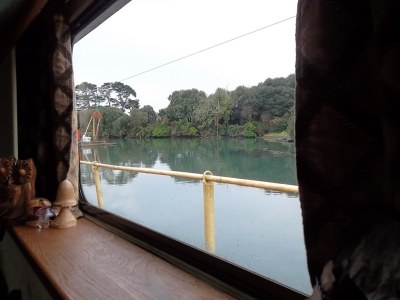
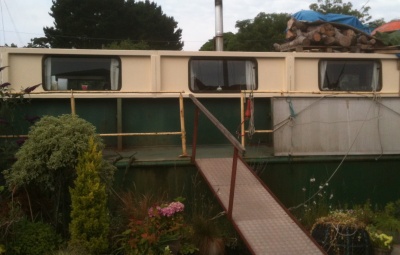
We also paid a fond farewell to Ajax a large ex naval training vessel that has blighted our view for the past three years. We took jenny b out to see the tug take her away and to wave her on her way to Shoreham-on–sea see pic of our lovely new view.
April/June Since my last post we have been getting on with making the patio door and framework, preparing the blank door panels ready for glazing, the framework would comprise of two panels glazed but fixed and two panels that open,
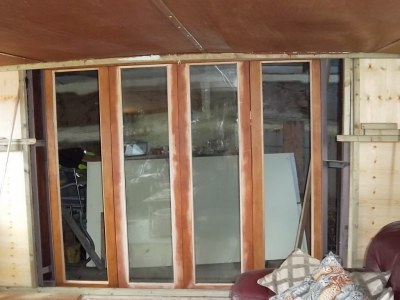
so when the doors are open you still have a clear view through 4 panels, with the frame work made and installed on the patio side of the lounge wall, it was time to remove the wall it self, this only consisted of 4 sheets of 18mm plywood and was fitted as a temporary wall, so the lounge was cleared, ready to take the wall out and open the lounge to the elements, fortunately the current patio area is still under cover, removal of part of the cover will be at a later date, most of the exterior walls are complete as we decided the area either side of each door we would use as a wood store, which is something we need, and its close by for getting logs in, in the winter months.
Anyway with old plywood removed it was time to build the wall framework which would be quite thick,
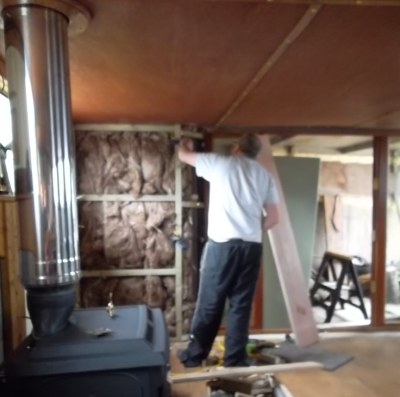
this done, we then ran some cables for lights and a deck power socket, the walls where then stuffed full of rockwool insulation, the edge of walls have been tapered, towards the doors so as to lead you onto the patio, which look much better than having the walls boxed square, anyway with this done both side walls were clad with mdf and painted.we moved onto glazing the doors and side panels which were then beaded to stop them falling out again!! All the then, exposed bare doors and frame timber was stained and sealed, then we fitted new flooring in front of the doors,
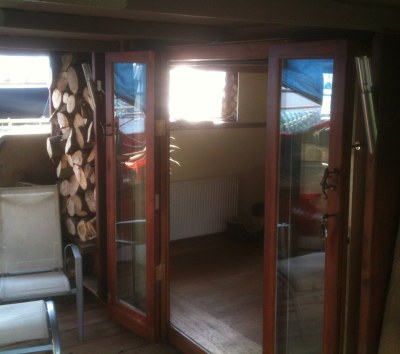
this lead onto doing the trims around the floor and ceiling, these timbers where of course European oak which was oiled as usual, we had brought some curtains for the patio doors but they did not suit, so it was off to Dunelm mill To buy some more, which hang and fit much nicer,

Another job we finally go sorted was having the fire alarm system commissioned, and its that time again, back to workkkkk.
August to November, Been a bit busy for the last few months and not had the time to sit and write the blog but here we are again. After having the grandchildren down for two weeks in august which was great, we all had a excellent time so no work got done that trip. The following trip we went to a family wedding in Kings Lynn and to granny sit whilst the happy couple had a short honey moon which again went very well.
However we did get some work done we managed to board out most of the internal patio walls, we also made some glazing panels to close off the patio for the winter months. This works well as we have log stores on the patio which we can access without going out into the weather. Also it means we can enjoy the patio when the weather is on the warmer side or use to party like on Halloween when we had a small get together and got the Barbie on the go, home brew wine, beer and a gallon of proper scrumpy and of course a decanter of rum,All good as they say.
Anyway last trip Oct it was back to the grind, we had decided to swap the office and bathroom around; we had brought and planned to fit a Jacuzzi bath but just prior to me fitting it we decide to try it for size. Well what a shock, it was a lot smaller than it looked and not very comfortable so we decide not to fit it and look for a proper bath. We got lucky as one was being sold on Gumtree (website selling unwanted items) that was cheap and only 6 miles up the road and was in fact a complete bathroom suite in very good condition.
The fun started when we got the suite on board, the bath would not fit where we had planned to fit it; not and still be able to open the door. So we revised our plans again; the bath and vanity unit fitted perfectly along the inner wall, this would also mean having to move the door from the main hallway into alley way leading to the bridge (to be cut through at a later date).
Now we knew the new layout it was time to get busy firstly cutting access holes in the steel floor for all the pipe work. This done we then used vinyl lay floor covering to cover the walls around the lower end of the bath, as this will have the old shower fitting fitted here so we have a choice of a shower or bath. The new door way was made and the old one filled in; the after end wall around to the door was clad floor to ceiling with pine T&G, from the other side of the door to the end of the bath was T&G ed to only about a third up. Next up went the ceiling, white plastic T&G boards we used elsewhere, this included wiring and fitting a new bathroom light and switch.
The wall where then painted along with the T&G, the wood work was then sanded down to show up the grain and remove the roughness, the wood was then given two coats of mat varnish to seal against moisture.
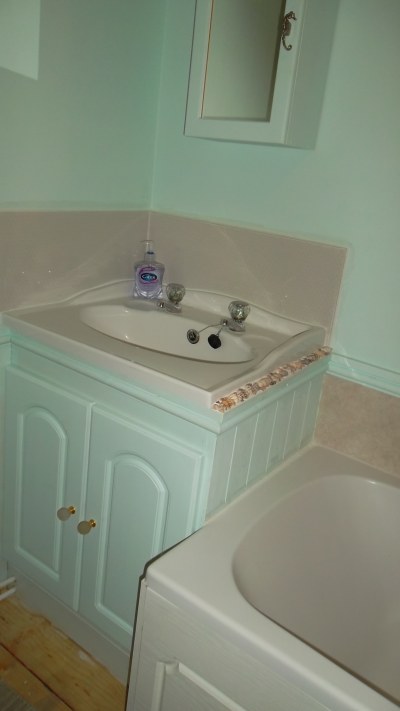

The steel floor was then insulated with compress cardboard and sheet of ply was fitted over the top to this, we will attach the final floor covering to this (not decide yet). We then removed the toilet system from its original place and fitted in the new bathroom, the shower control was then fitted and plumbed along with the sink, a radiator was fitted and piped through but not yet connected. With all the plumbing tested and working ok we boxed in the toilet plumbing and fitted the bath side.
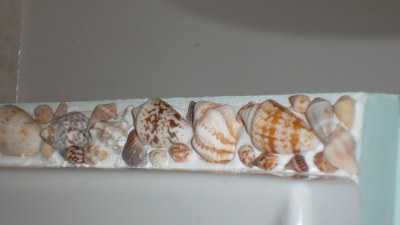
The bath and sink were then sealed with silicon sealer shells were added, a special touch as these were collected by us with our grandsons Will and Sam when they were living in Cyprus and we went on a visit, we used to go to a beach they christened \”Grannies Beach\” and that is where the shells were collected so they are very special and it was nice to be able to use them in this way. Then the door was hung…..and that was it as it was time go back to my other boat.
It’s been awhile since we updated the blog, what with the weather and helping others with their projects not much has been done on diction.
However we have been working on one problem that is our leaking lounge windows due to the poor quality Chinese plywood we used to make the main window frames. We didn’t know this at the time of course and the way the windows dispel water has caused the lower parts to rot away. The problem has been not wanting to do a complete replacement which would be both expensive and time consuming as there are eight windows in all. Eventually we decide on fibre glassing the whole lot as this would be both strong and water proof for years to come. However to lay fibre glass directly over the original wood and steel work would be difficult to obtain a reasonable finish without hours upon hours of sanding. So given that each window was more or less the same size we decided to make a master mould of the complete window area, 8ft by 3ft then from this make eight window panels pre coloured that would be glued in using modern polyurethane glue, once cured it looks and acts like rubber, this is both strong and flexible.
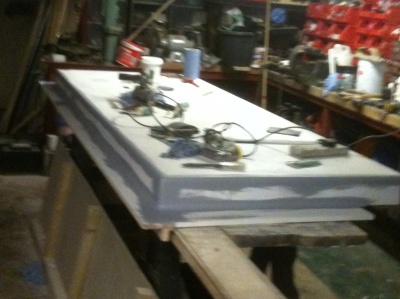
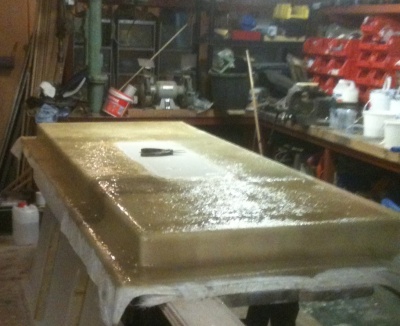
The mould: this was made from several pieces of melamine faced chipboard, in hindsight MDF would have been much better but it was hard enough to get a 8ft by 4ft sheet of this stuff, everyone stocks 8ft x 2ft but not 8 x 4. The mould would need three faces with one internal radius and one external radius on 3 edges, the internal radius was the hardest to make, in the end we brought some wooden trim pre machined for the job. With the mould finished it was then waxed up, using mould release wax four coats where given over a couple of days, each coat polished between coats. The mould is now ready.
The next part was to paint on the gelcoat which was mixed with harder, this will be the outer coloured layer, once done would be left to cure about 2 hrs in our workshop. Once this had cured it was given a second coat, and again left for 2 hrs to cure. Normally only one coat of gel is required but 2 coats allows you be able to sand out any errors without cutting through to the glass area, that’s the plan anyway.
With the gelcoat cured it was time to start the lay up process this involves laying two sheets of 450gram fibreglass and resin on to the gelcoat, this was then left to cure overnight before attempting release.
We made eight of these had a few problems with the mould on the way but did some running repairs. These will be fitted soon but I have some steel work to do first and fitting our new ex cruise ship doors which are made of Burmese teak they were fitted to cruise ships made in the early 1950’s now scrapped, but the doors will live on.
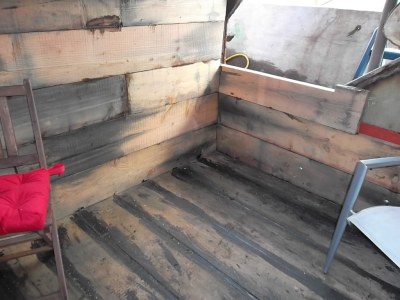
July 2013 Hi all, this trip didn’t go as planned but none the less we managed to get a bit done. On day one we stripped out the old timber from the Stb side (quay side) including the old front door and frame as these where only temporary anyway. This left a 13ft section of boat open to the elements but this was not a problem as the weather was set hot and fair for the next few weeks and we had previously taken delivery of the steel needed to replace the timber.
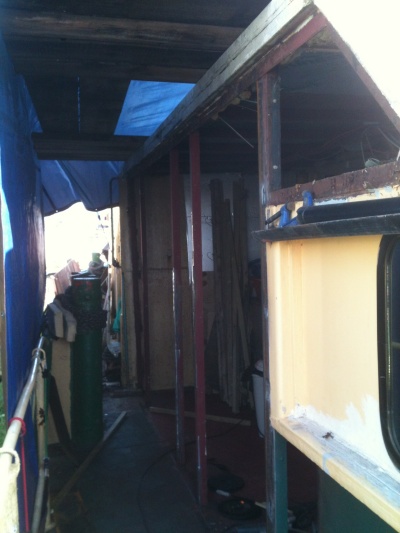
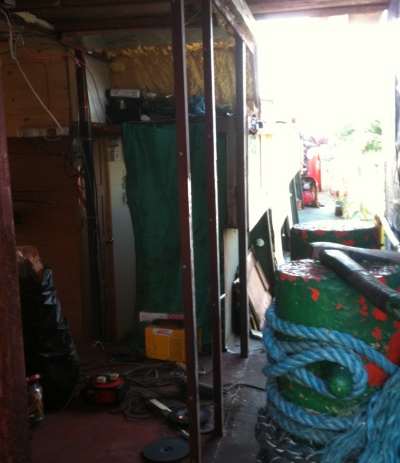
The next few days were spent cleaning, grinding and modifying the steel frame work to allow better access around the mooring bits (posts), as it was difficult getting my bulk past them to access bridge and aft deck!!
The steel plates where cut and tacked into place and a circular hole was cut for the large porthole window that will be fitted, short seam welding was carried out at different spots to help prevent the distortion that you would get with continuous seam welding.The next few days where spent just continuously welding.
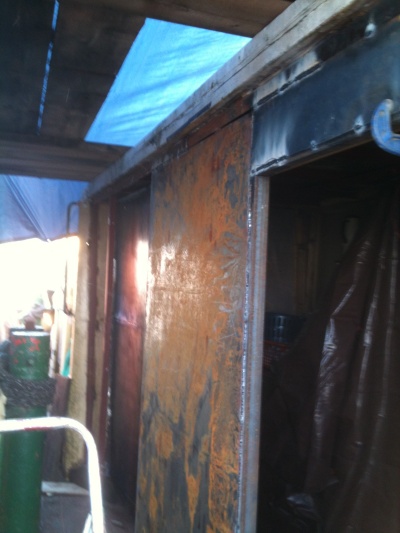
With the welding done the inside of the plates where primed with red oxide, the outside plates need to be de scaled, this means the coating put on to protect the plate whilst waiting to be used needs to be removed. This can be done via sandblasting or let the weather do it for you by letting the steel get a film of rust on them, the rust is then removed with A wire brush then sprayed with a light acid and washed and dried this can now be painted and the paint will key to the pitted steel and not flake off in a few years time. The first steel plate we used had sweated under the plastic sheet that covered them and had gone rusty, so we were able to treat, prime and undercoat the steel up to that point. The rest is being hosed every couple of days to make it rust but its slow going.
The new 60year old door and frame was fitted (our two new doors are refurbished and were originally from cruise ships built in the 1950’s and are believed to be Burmese teak they have a small porthole like window in the top half) but not yet sealed in, I want to get a couple more coats of paint on the steel work first,
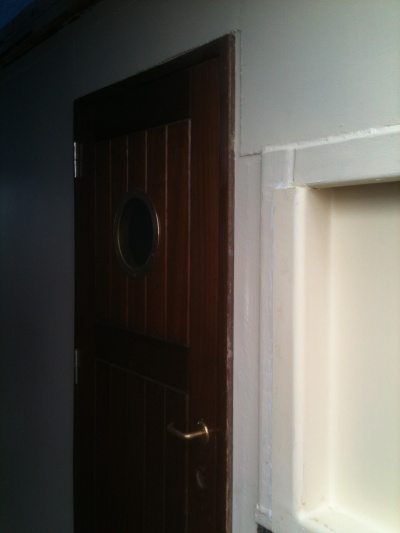
we did manage to get the paint to exactly match the fibreglass panels which is light ivory.
On my last week’s leave we had our great niece Caris over to stay from Australia, when I wasn’t required for taxi service I managed to get 4 of the new fibreglass panels fitted,

this involved removing the anti-condensation strips from around the inside of the windows, then the window frame was removed from the supporting board, this was a bit messy as the sikaflex I had used to install them was hard to get off, it’s not designed to come apart, it did take some wood with it, the fibre glass panel was trimmed to shape, this was then stuck and clamped into place using soudaflex 40c similar to silkaflex but a lot cheaper but just as good, this was left for 24 hrs to cure, once the panel was set fast the window frame after being cleaned up was resealed and clamped back into place and left to cure overnight, once set the excess soudaflex was trimmed, this was done 4 times one for each window, once the panels where in place,
joining pieces where stuck in place between each of the panels, The panels were back filled with foam to fill any voids.
Sept to Dec,’To all of our readers we wish you a very Happy Christmas and a wonderful New Year from the crew of Diction.
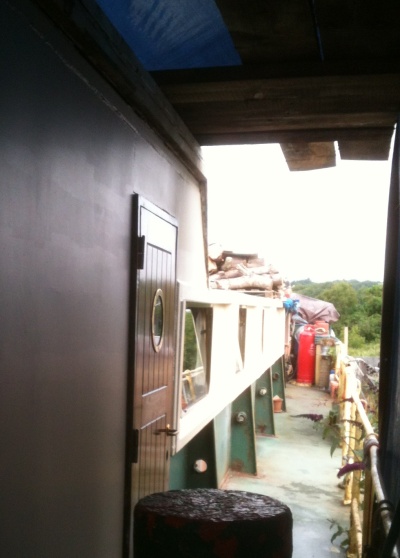
Time seems to fly by these days and I’m a bit behind with the blog so here goes again. My last trip home with the weather set fair, be it a bit chilly, we decided to crack on and get the covered companion way done,
as this will keep some of the weather off our lovely new door.
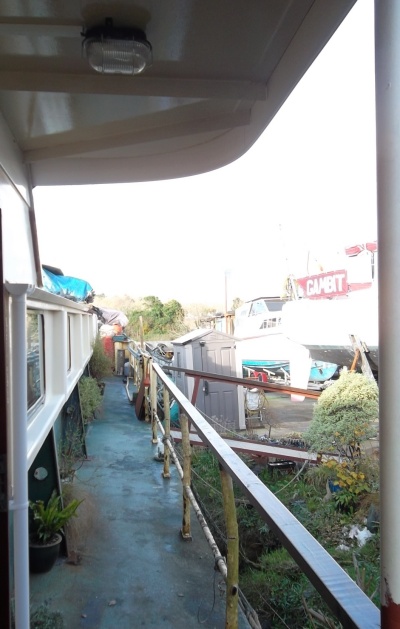
This meant extending the roof frames out to the side of the boat and was supported with an angle iron outer piece and post supports from the deck
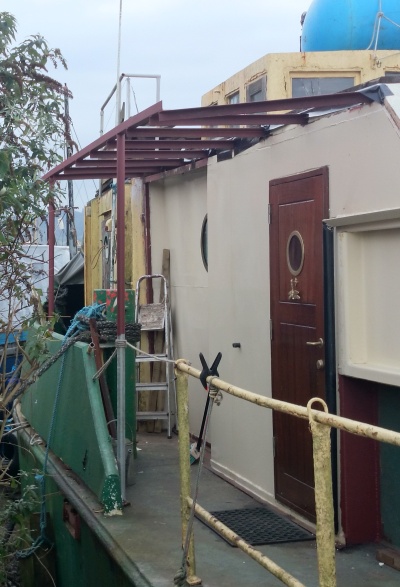
this was all welded and primed then 18mm ext grade plywood was cut to shape the under side was primed, undercoated and glossed, once dry they where glued into position, the top side was then fibre glassed to give a protective cover.
Next we fitted a 7 inch upvc facia board around the outer edge and also along the top bulkhead to cover the area we cut away to fit the frames these where fitted using stainless steel screws, nuts and bolts.

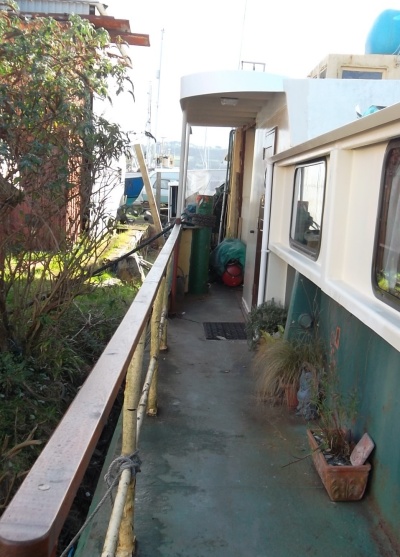
During the fitting the support posts (stanchions) we had to remove part of the hand rail which was just a length of 1” pipe buckled and bent, so we chopped it all off down to the gangway and replaced it with nice piece of 3×2 planed tanilised timber which we treated with a coloured varnish wood preserver.
The previous trip was spent refitting out the utility room which taken apart when we renewed the outer bulkhead, this meant insulating the outer bulkhead and deckhead with 50mm kingspan form boards,
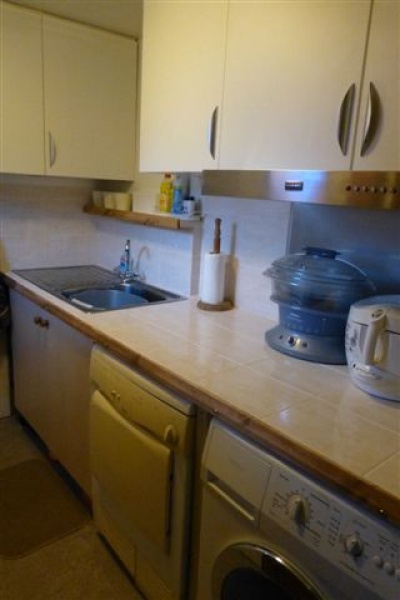
the bulkheads where then battened and clad with pine t&g cladding, 4 wall cupboards where fitted, one was modified to except the 700mm extractor unit, the deckhead was then framed and clad with white plastic cladding and two lighting units fitted and wired, under the extractor hood we fitted a stainless steel splash sheet then we tiled the work surface and surrounding walls.
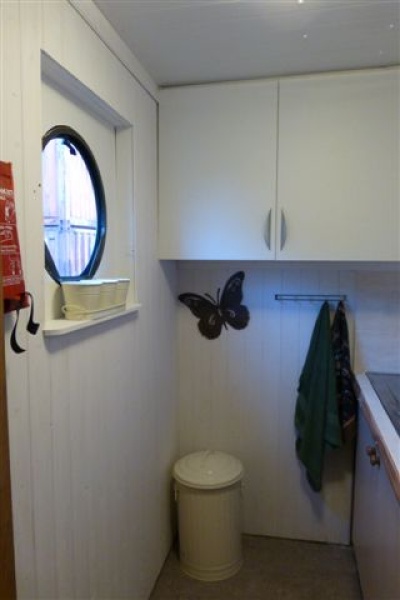
We finished off with refitting the sink hanging the new door and covered the floor with insulated underlay then fitted vinyl lay.

I then trotted away to sea and left the missus to paint it as she saw fit.. some what risky I know….till the next time.